Need to replace the fabric on your RV awning? Why fight with it, trying (and failing) to figure it yourself? Don't risk injury. Instead, watch this video to make sure you do it right (and easily) the first time.
0 Comments
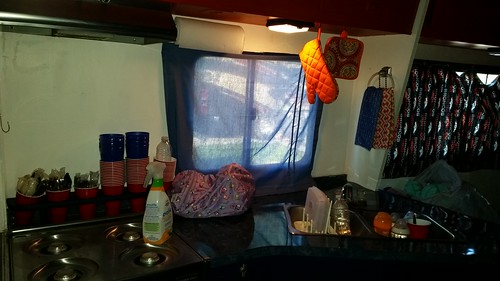
If your RV sink is turned off or broken in some way, there are still several ways to make use of it. Find out which way is right for you, based on how bad your RV sink situation really is.
Method One: Hand-Fill and Drain Later This method is best for those who have a working drain and a grey water tank that is less than ¾ full. If your p-trap is leaking, do not use this method. However, if there are no leaks when your pump is turned off and your grey water drains into the tank properly (and your tank is capped with the release valve closed), you can use this method. Since your RV sink pump will be turned off, you must be either boondocking or you have an issue when the pump is turned on. This means you will need a couple gallons of water. One is for a rinse bucket and the other is for your washing water. You can either buy this water or if you are at an RV park (or other location) with access to water, you can fill up a jug or bucket accordingly. Plug your drain and fill one side of your turned off RV sink with water. Add antibacterial dish soap and swish it around to make it soapy. Add dishes and wash them. Place them in the empty side of the sink and drain the soapy side. If you have a heat source available, you can boil the water first for added disinfecting. Use the rinse jug or bucket to rinse the dishes over the unplugged side of the sink. Again, only do this if your tank can hold both the rinse water, as well as the soapy water. Dry the dishes inside the clean sink, on a dry towel, or in a drying rack. Once you have access to a sewer drain hookup, drain your grey water tank. If you can’t get access to a hookup and you need to drain it, drain it into a bucket, safely handle/store it, and drain the bucket as soon as there is a safe place to do so. Method Two: Hand-Fill and Hand Drain This method is best used if your RV sink drains well, but the tank is full. Follow the same instructions as above, except don’t drain the water into the sink. Both sides should be plugged. When emptying is needed, siphon the water out with a jug and pour it into a bucket. Follow proper safety methods for disposing of the grey water in the bucket. If there is any residue left in the sink that cannot be siphoned, use a towel to soak it up and dry and clean the towel as soon as possible. Method Three: Cover the Drain Hole and Use Bins in the Basins This method is basically the same as method two, except you’re going to use bins to do the washing into so that as little as possible gets into the actual RV sink. This is best for when you either don’t want to siphon out water or don't want to risk getting too much water into the actual sink. Other Possible Options
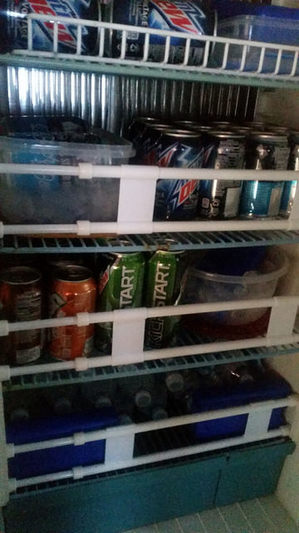 Image © Lyn Lomasi; Flickr.com Image © Lyn Lomasi; Flickr.com So, you have a fridge in your RV or camper but you’re boondocking and can’t turn it on or it’s broken. Here’s how to use a turned off or non-working RV refrigerator as a cooler for food, drinks, or both. Materials:
How to Use Your Turned Off or Non-Working RV Fridge as a Cooler
You can use your makeshift RV or camper trailer refrigerator cooler for drinks, refrigerated food, or both. The first step is to place a freezer pack into each storage container. Then, fill them with ice. Place the covers onto the shelves and then place the containers on top of the covers. The containers need to stay open to keep the refrigerator cool enough. Placing them on top of the covers helps eliminate dripping when the ice melts and helps keep them in place when your RV moves. Once the containers and food are in place for each shelf, use the RV refrigerator bars to secure everything so that it doesn’t move too much while driving. These bars are inexpensive and will save you from having food crash against the door and either get smashed, spilled, or cause the refrigerator to open while the camper is moving. Once your shelves are stocked and secure, place a freezer pack in each refrigerator drawer and then fill about halfway with ice. The space left over is where you will place the food that needs to go into the drawers. Freezer bags and storage containers help prevent your food from getting wet, just like in a traditional cooler. Quick Tips:
|
RV, Nature, & Travel Shamans

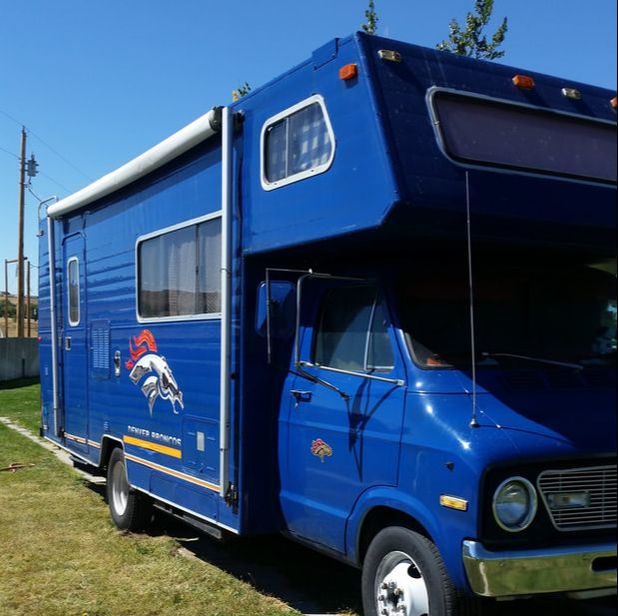
We are a homeschooling family, sometimes roadschooling in an RV. We enjoy spreading the word about how to #RV successfully! We've traveled across the country in a '77 Minnie Winnie decorated Denver Broncos style and dubbed the BroncoBago. We've also had other rigs as well. Follow along as Lyn Lomasi and family share adventures, tips, how-to guides on the RV Life in a #Winnebago, and more! If it's about RVs, homeschooling, roadschooling, camping, and the like, you can bet we'll cover it. Hop in and enjoy the ride!
Categories
All
Archives
November 2023
|
- Brand Shamans
- Brand Healing
- Inner Healing
-
INTENT-SIVE NATURE
- Content & Brand Elevation
- Healing Jewelry & Talismans
- Bath, Beauty, & Self-Care
- Healing Sessions
- Rituals, Herbs, & Altar Supplies
- Gawwwdess Baby Boutique
- Soul Flame Gifts
- Yoga & Meditation
- Books & Media
- Education & Homeschool Resources
- Home, RV, & Decor
- Clothing
- Pets
- Custom Orders
- Monthly Subscription Boxes
- October Festivals
- FLOW-Key Parenting
- About & Contact
- RV, Nature, & Travel Shamans
- Souls Within
- Life & Home
- Heart 'N Mind Homeschool
- The Homeschooling Mommy
- Books & Authors
- Speak Up!
- Pawsitive Pet Parenting
- Manifesterz
- Gifts In Minutes
 RSS Feed