 As the frosty winds of January sweep through our lives, bringing with them the notorious winter blues, it's time to embrace the warmth of your inner light. In this cozy corner of the internet, where spirituality meets practicality, let's explore together how to beat those January winter blues, not just for ourselves but for our businesses and brands too. Embrace the Light, Banish the Blues Winter blues, often known as Seasonal Affective Disorder (SAD), can cast a shadow over our energy and mood. But fear not! A simple yet effective remedy is to bask in winter blues light. Sunlight, even on the chilliest days, is a natural source of Vitamin D, vital for lifting spirits. Incorporate winter depression vitamin D sources into your daily routine, like a brisk morning walk or by simply sitting near a sunny window. Meditation: Your Winter Shield In the quiet moments of winter, meditation becomes a powerful tool. It’s not just about finding peace; it’s a journey to rediscover your inner strength. Meditation to beat the blues can transform winter's silence into a source of profound healing and insight. Light a candle, hold your favorite crystal (amethyst works wonders for tranquility), and let your thoughts flow like a gentle stream.
Nutritional Wisdom: Vitamins for the Soul
Nutrition plays a key role in combating the winter blues. Winter blues vitamins like B12, Omega-3 fatty acids, and Magnesium can be game-changers. They’re not just food for the body, but nourishment for the soul. Infuse your diet with vibrant, life-giving foods that are as colorful as they are nutritious. Feng Shui Your Space Your environment influences your energy. Winter blues home Feng Shui is about creating a space that's a sanctuary. Rearrange your living area to enhance the flow of positive energy. Introduce elements of nature like plants or stones like clear quartz to amplify harmony and balance. Sleep: Your Secret Weapon The link between sleep and mood is undeniable. Winter blues sleep troubles, such as sleep deprivation or depression insomnia, need our attention. Create a bedtime ritual that calms the mind and soothes the spirit. Lavender essential oils or a warm bath before bed can work wonders. Mindfulness: A Daily Dose of Joy Mindfulness techniques for winter blues are like daily doses of sunshine for your soul. Simple practices like gratitude journaling or mindful walking can transform your perspective, turning mundane moments into opportunities for joy and connection. Business Owners: Light Up Your Brand For business owners and freelancers, beating the winter blues is also about energizing your brand. Purchasing content and branding services or hiring writers can infuse new life into your business during these quieter months. Quality content that resonates with your audience can turn the winter blues into a season of growth and connection. Healing Services: The Magic Touch For those seeking a deeper spiritual connection, consider exploring healing services. Whether it's crystal healing or energy work, these practices can align your personal and professional energies, helping you manifest an abundant life. Take Action: Your Path to Abundance Remember, the power to change your world, both inner and outer, lies in your hands. Don't let the winter blues define your January. Embrace these practices, share them with your lineage, and watch as the magic unfolds in your life and business. Join Our Tribe You're not just a reader; you're family. Our brand is more than a service; it’s a way of life. Dive into our content, explore the comment section, see what you can contribute, and let's walk this path together. Because here, you’re home. Conclusion In this article, we've woven together the essence of warmth, light, and healing wisdom to guide you through the winter blues. Whether you're a business owner looking to revitalize your brand, a freelance writer seeking inspiration, or anyone in search of spiritual nourishment, these tips are your stepping stones to a brighter, more vibrant January. Remember, the journey is as beautiful as the destination. Let's make this winter a season of growth, connection, and abundant joy. *Disclaimer: Crystal and healing interpretations are for informational purposes only. Your results may vary. Be safe and wise on your magical journey.
0 Comments
by Lizzie Weakley, Contributing Writer
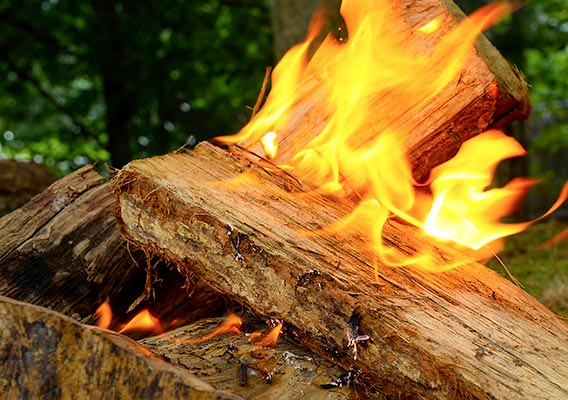
The best and cheapest way to keep the winter chill away from your house is a crackling fire in your fireplace or wood-burning stove. But you can’t have a fire without wood, and the question of where and how to store all that fire fuel may be on your mind. Follow these four tips for storing your firewood.
Where to Store Your Firewood You may wonder where, relative to your house, you ought to store your firewood. Too many people place the wood beside their house because it stacks so well there. That is a huge mistake! That dead wood is a magnet for termites. The last thing you want to do is give termites an invitation into your house! If you already have termites or have been storing your wood against the house, you might want to contact a pest exterminator professional, like PermaTreat Pest and Termite Control. Rather than stacking the wood next to your house, store it far away, but in an area where you have easy access, especially if you live in snow country. Don't place it against any structure, not even a plastic shed. Why? You want that stack of wood to breathe. If it does not, the moisture will make it no longer usable for firewood. That wood needs to breathe on both of the long sides. Proper Stacking Since firewood needs to breathe, then it won't do to just throw the wood in a pile. Also, you need to keep the wood from falling. Use treated 2X4s on the ground to keep the wood from touching the wet ground. On each end of the pile, build a log cabin-style end that will keep your pile from falling down. Stack the pile no more than four feet high and have each pile be only one stove-length deep. Protecting Wood Against the Elements For optimal burning, it’s essential to protect your firewood. A tarp will keep the wood from getting rained and snowed on. Since the wood pile has to breathe, the tarp needs to allow the wood to be exposed along the sides. You don't want the rain to be able to fall on the sides, but you do want the pile to breathe and not get moldy and decay. You can also store the wood in a shed or barn, as long as there is plenty of air flow. Don’t keep the door closed. Storing Some Wood Inside You will obviously come to the conclusion that you don't want to venture out in the rain and snow every time the fire gets low in the wood stove. You can get a fancy log holder, a cheap one, or even a heavy wooden box to store your night's supply of wood inside the house. This way, you can feed the fire while staying warm and dry. A good wood pile is your best investment towards winter warmth. Just keep the pile away from structures and cover it with a tarp, so it can breathe. Use log cabin-style ends to hold you pile of stacked wood in place, keeping it off of the ground. Bring in a night's worth of wood when you come home from work.
Author Bio
Lizzie Weakley is a freelance writer from Columbus, Ohio. In her free time, she enjoys the outdoors and walks in the park with her three-year-old husky, Snowball.  Image © Sharon Mollerus; Flickr.com When the fall season hits, it is time to start preparing your home for the winter and checking for simple repairs that you can do yourself. Doing this will help maintain your home for the coming months, making it a more comfortable and safe environment for you and your family. Here are 10 easy DIY repairs you should do on your home in the fall.
Leaking Kitchen Sinks If the pipes under your sink are leaking, simply purchase a new PVC p trap and a roll of teflon tape. Removing the old one is as simple as unscrewing the fastened areas and just pulling it off. When installing the new one, place teflon tape at all the joints and screw together the joints. To get the tightest fit, use a plumbing wrench to finish off the screwing. Test your job by running the water for a few minutes. If any water leaks out, either you did not use enough teflon tape or you did not screw the parts together tight enough. If your sink is leaking around the faucet area, rather than the pipes, you can solve this by replacing the faucet. Simply purchase a new faucet. The instructions for installing your faucet will come in the package. Each can be slightly different. You may also need caulking materials or teflon tape. Check the instructions that come with your faucet. Bathroom Leaks Much like in the kitchen, leaks need to also be addressed in the bathroom. Repairing a leak in a bathroom sin is fairly similar to replacing one in a kitchen. Toilets can also leak. Usually it is due to the ball valve kit located under the back cover. These are about 10 bucks each at a home improvement store. All you need is the kit. It is easy to install and comes with instructions. Dishwasher To clean the dishwasher, first start by pulling out all the racks and attachments. Now check all the drains and soap containers for debris. Pull any of that out. Sometimes little pieces of food or glass can get stuck in those, so watch for the glass. Once that is done, check all the rubber sealing and be sure it is all secured properly. If not, adhesive rubber strips can be purchased at home improvement stores. Application is as simple as sticking the strips in the proper spot. The adhesive on these can be strong, so be sure you have it in the proper place before pressing it to the surface. Part of maintenance also includes cleaning. For this, you'll need vinegar, concentrated lemon juice, baking soda, and a sponge or dishcloth. Sprinkle baking soda along the bottom of the dishwasher. Fill a spray bottle halfway with vinegar, 2 tablespoons of lemon juice, and the rest with water. Spray down the inside of the dishwasher, including the bottom, where the baking soda is. The baking soda will bubble. This is fine. That pulls up dirt and grease. Now starting at the bottom, scrub the entire inside of the dishwasher, including the door. Do not rinse away the solution. Replace the racks and fill all soap and other liquid dispensers with the lemon juice and vinegar mixture. Close them and run a normal cycle with a hot rinse and heated drying cycle. Weather Stripping Check the weather stripping on the interior, as well as the exterior of your home. Replace any worn or peeling areas. Damaged or improperly placed weather stripping can cause cool air to come inside the home, as well as let heat escape. Weather stripping can be purchased at hardware and home improvement stores. There is stripping with adhesive or that which has to be nailed down. Apply according to which type you choose. Be sure the stripping is applied securely to the surface so that it does its job effectively. Sealing Cracks Check interior and exterior doors and windows for cracks. Use caulking to seal any detected problem areas. To caulk a crack around a door or window, simply squeeze a line of caulking along the exposed area and swipe it with a caulking sponge to press the sealant in further, as well as to create a smooth finish. Don't forget to also purchase a caulking gun when you buy the caulk. Without one, the caulking is not as easy to apply. A caulking gun can be as low as a few dollars. Exterior Basement Drains Some homes can have exterior drains leading to the basement. Be sure to clear away any brush, leaves, dirt, or other debris from the drain openings. Vinegar is a great natural substance that cuts through tough-to-remove dirt and other substances. Simply spray it on from a water bottle, let it sit for a moments, clear away the debris, and wipe the surface clean with a cloth. As for the inside of the drain, run a plumbing snake or auger through the drain. If it is a short drain, a wire coat hanger can sometimes be substituted for the snake or auger if you don't have access to either. Just pull the coat hanger in and out of the drain. Shut Off Outside Water The fall season is a great time to shut off the access to any outside water. Doing so can prevent the freezing of the outdoor pipes around hoses and other outdoor water valves. Also, when you do this, unfasten any hoses or other devices attached to outside water valves. These should be stored away until spring. Carbon Monoxide & Smoke Detectors This is a good step for more than just the fall season, but be sure you check to see that all of your detection devices are working properly. Most some detectors and carbon monoxide detectors have a test button. Press that button on each to see if they work properly. With increased usage of space heaters, fireplaces, and other heating devices during the fall season, it is important that your family will have working alert devices, should a fire or natural gas problem occur. Gutters During the fall, leaves, pine-cones, and other falling debris can get clogged in your gutters. Clogged gutters can lead to poor drainage. To clean out your gutters, simply scoop out the debris that has collected. A garden trowel works well for this. Once that is done, spray the gutters out with a garden hose or pressure washer. If you are using a garden hose, attaching a high pressure spray nozzle will make this easier. If any of the tubular gutters are clogged, use a plumbing snake or auger to unclog them. Thermostat & Heaters It is important to be sure your thermostat and heaters are working before he weather starts to get cooler. First, test them by simply turning them on and being sure that the heat is coming out at the right temperature. If there is no heat coming from portable heaters, they should be replaced. If there is no heat coming from the furnace, you will need to test the thermostat. To do this, first turn off your furnace. Then, return to your thermostat box and remove the cover. Remove the wires from the panel by unscrewing them from it. Take the red and white wire and wrap them together. Tape the wires you won't use to something, such as the wall, while you are working. You don't want to lose them inside the wall. Turn the the furnace back on. If the furnace blows and its burner ignites, then your thermostat is bad. If this doesn't happen, you may actually have a problem with the wires, not the thermostat. Check to make sure the wires run all the way to the furnace. *Also found on Better Plumbing © Lyn Lomasi; Write W.A.V.E. Media |
LIfe & Home Journal

Archives
January 2024
Categories
All
|
- Brand Shamans
- Brand Healing
- Inner Healing
-
INTENT-SIVE NATURE
- Content & Brand Elevation
- Healing Jewelry & Talismans
- Bath, Beauty, & Self-Care
- Healing Sessions
- Rituals, Herbs, & Altar Supplies
- Gawwwdess Baby Boutique
- Soul Flame Gifts
- Yoga & Meditation
- Books & Media
- Education & Homeschool Resources
- Home, RV, & Decor
- Clothing
- Pets
- Custom Orders
- Monthly Subscription Boxes
- October Festivals
- FLOW-Key Parenting
- About & Contact
- RV, Nature, & Travel Shamans
- Souls Within
- Life & Home
- Heart 'N Mind Homeschool
- The Homeschooling Mommy
- Books & Authors
- Speak Up!
- Pawsitive Pet Parenting
- Manifesterz
- Gifts In Minutes


 RSS Feed