Brand Shamans Content & Creators Community, LLC
  • Brand Shamans
  • SPIRITUALITY & BRAND ELEVATION STORE
    • ✨ Gift Cards ✨
    • ✨ Content & Brand Elevation ✨
    • ✨ Healing Jewelry ✨
    • ✨ Oils & Butters ✨
    • ✨ Book A Consultation Or Session ✨
    • ✨ Ritual & Altar Supplies ✨
    • ✨ Books, Media, & Homeschool Resources ✨
    • ✨ Original Artwork ✨
    • ✨ Monthly Subscription Boxes ✨
    • ✨ Custom Orders ✨
  • Brand Healing Journal
  • Books & Authors Journal
  • Inner Healing & Spirituality Journal
  • FLOW-Key Parenting Journal
  • Heart 'N Mind Homeschool Journal
    • Free Homeschool Word Search Worksheet Generator | Brand Shamans Content & Creators Community LLC
  • Life & Home Journal
  • RV, Nature, & Travel Shamans
  • Speak Up! ; A Homelessness & Social Justice Journal
  • Pawsitive Pet Parenting Journal
  • Souls Within Creative Writing Journal
  • About & Contact
  • Ask Lyn Lomasi
  • About Lyn Lomasi
  • Shipping & Return Policies
  • Brand Ambassadors
  • Affiliate Program
  • Brand Bible (Guidelines)
  • Writing & Style Guide
  • Disclosure/TOU/Disclaimer/Privacy
  • Freelance Writing Gigs
    • FREE Guest Post Submissions
  • ALL SITES
  • Brand Shamans
  • FLOW-Key Parenting
  • Lyn Lomasi
  • Article Writer For Hire
  • Pre-K Yoga
  • Heart 'N Mind Homeschool
  • Pawsitive Parenting
  • Gawwwdess
  • Brand Shamans Affiliates
  • Herbal Intent
  • Blogging Abundance
  • Nathan Raps (partner)
  • Realm Traveler (partner)
  • Princess Crystal Says (partner)
  • Authors Large And Small (partner)
  • Alliance Tech Repart (partner)
  • Brand Shamans
  • SPIRITUALITY & BRAND ELEVATION STORE
    • ✨ Gift Cards ✨
    • ✨ Content & Brand Elevation ✨
    • ✨ Healing Jewelry ✨
    • ✨ Oils & Butters ✨
    • ✨ Book A Consultation Or Session ✨
    • ✨ Ritual & Altar Supplies ✨
    • ✨ Books, Media, & Homeschool Resources ✨
    • ✨ Original Artwork ✨
    • ✨ Monthly Subscription Boxes ✨
    • ✨ Custom Orders ✨
  • Brand Healing Journal
  • Books & Authors Journal
  • Inner Healing & Spirituality Journal
  • FLOW-Key Parenting Journal
  • Heart 'N Mind Homeschool Journal
    • Free Homeschool Word Search Worksheet Generator | Brand Shamans Content & Creators Community LLC
  • Life & Home Journal
  • RV, Nature, & Travel Shamans
  • Speak Up! ; A Homelessness & Social Justice Journal
  • Pawsitive Pet Parenting Journal
  • Souls Within Creative Writing Journal
  • About & Contact
  • Ask Lyn Lomasi
  • About Lyn Lomasi
  • Shipping & Return Policies
  • Brand Ambassadors
  • Affiliate Program
  • Brand Bible (Guidelines)
  • Writing & Style Guide
  • Disclosure/TOU/Disclaimer/Privacy
  • Freelance Writing Gigs
    • FREE Guest Post Submissions
  • ALL SITES
  • Brand Shamans
  • FLOW-Key Parenting
  • Lyn Lomasi
  • Article Writer For Hire
  • Pre-K Yoga
  • Heart 'N Mind Homeschool
  • Pawsitive Parenting
  • Gawwwdess
  • Brand Shamans Affiliates
  • Herbal Intent
  • Blogging Abundance
  • Nathan Raps (partner)
  • Realm Traveler (partner)
  • Princess Crystal Says (partner)
  • Authors Large And Small (partner)
  • Alliance Tech Repart (partner)
Brand Shamans Content & Creators Community, LLC

Create a Home Spa for Self-Care Sundays

1/17/2024

0 Comments

 
© Lyn Lomasi; Owner/Shaman/Master Creator at  Intent-sive N8R & Brand Shamans Content Community LLC
Create a Home Spa for Self-Care Sundays
In the heart of every home, there's a special space waiting to be transformed into a sanctuary of serenity and self-care. Let’s turn your living quarters into a blissful spa retreat for those sacred Self-Care Sundays. It's not just about pampering; it's about rejuvenating your spirit and infusing your life and work with positive energy.

Setting the Scene for Tranquility

Start by choosing a cozy corner. It could be your bathroom, bedroom, or any space where peace prevails. Soften the lights, play some soothing tunes, and let the world outside fade away. Candles? Absolutely. Go for natural scents like lavender or jasmine that calm the mind and soothe the soul.

The Power of Healing Crystals

Enhance your spa experience by bringing in the gentle touch of healing crystals. A rose quartz by your side radiates love and harmony, while amethyst can ease your thoughts, perfect for those seeking a deeper meditative state. Remember, these stones are companions on your journey to inner peace.

Homemade Spa Treats

Why not whip up some homemade spa goodies? A simple sugar scrub, a blend of brown sugar and olive oil, does wonders for the skin. For a refreshing face mask, mix honey and yogurt. These natural ingredients are not only skin-friendly but soul-soothing too.

Mindful Practices for Inner Healing

As you soak or apply your homemade treatments, practice mindfulness. Focus on your breath, the sensations on your skin, and the peacefulness within. This moment is about connecting with yourself, nurturing both body and spirit.

Self-Care for Entrepreneurs

For the business minds among us, Self-Care Sundays are crucial. They’re not a luxury; they’re a necessity. A relaxed mind fosters creativity and sharp decision-making. It's time to recognize that taking care of yourself is taking care of your business.

Crafting Your Self-Care Sunday Box

Create a self-care Sunday box filled with your spa essentials. Include your scrubs, masks, a special towel, and perhaps a journal for reflections. This box isn't just a container; it’s a treasure chest of well-being.

The Gift of Relaxation

Consider sharing the joy. A self-care Sunday box makes a thoughtful gift for friends, family, or even clients. It’s a meaningful way to say, “I care about you,” spreading wellness and positivity.

Conclusion: Embrace Your Self-Care Ritual

As we wrap up our spa day, remember that self-care is a journey, not just a destination. Every Self-Care Sunday is a step towards a more balanced, joyful life. Embrace these moments of tranquility. They are precious, just like you.

In this article, we’ve explored how to transform a simple day at home into a rejuvenating spa experience. Whether you’re a business professional, a freelance writer, or someone on a spiritual path, remember that self-care is the foundation of success and inner peace. Embrace these practices, and watch how they enrich not just your Sundays, but every day of your life.

*Disclaimer: Crystal and healing interpretations are for informational purposes only. Your results may vary. Be safe and wise on your magical journey.

Last updated 3/19/2025

🐉🪔 Dragon Essence Sacred Healing Body Butter 🪔🐉

Shop

On Sale

On Sale

God Or Goddess Healing & Self-Care Box

Shop

🍒 Moisturizing Cherry Almond Shower Scrub 🍒

Shop

🍝💨 Ethereal God and Goddess Fragrance Oils 🍝💨

Shop

Raw, Rough Black Obsidian Crystal Chunks

Shop

Handrafted Strawberry Almond Healing Balm

Shop

Handcrafted Healing Baby Balm

Shop

Handcrafted Cleanse & Restore Conditioner

Shop

🐉🪔 Dragon Essence Sacred Healing Oil 🪔🐉

Shop

💸 Etheric Golden 888 Money Manifestation Oil 💸

Shop

💋 Dragon Essence Sacred Healing Lip Balm 💋

Shop

🐉🪔 Dragon Essence Sacred Healing Foot Revival Butter 🪔🐉

Shop

Intent-sive Curves All Natural Butt and Breast Plump & Lift Butter

Shop

Dragon Essence Sacred Healing Custom Hair Growth & Restoration Oil

Shop
0 Comments

Beating Winter Blues (SAD) in January

1/17/2024

0 Comments

 
© Lyn Lomasi; Owner/Shaman/Master Creator at Brand Shamans Content & Creators Community LLC
Beating Winter Blues (SAD) in January
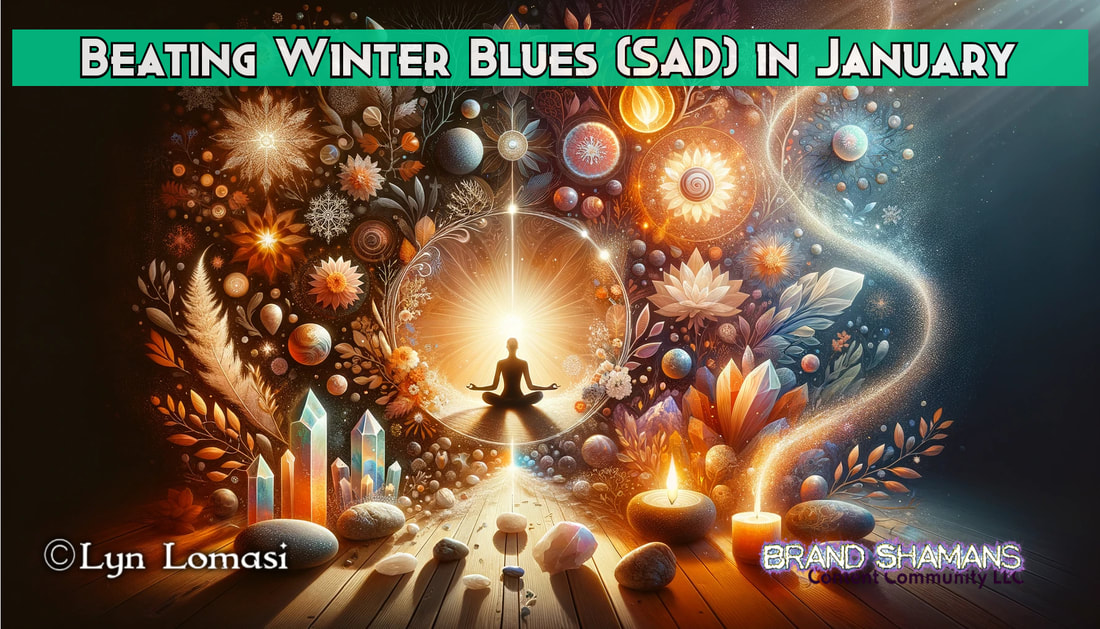
As the frosty winds of January sweep through our lives, bringing with them the notorious winter blues, it's time to embrace the warmth of your inner light. In this cozy corner of the internet, where spirituality meets practicality, let's explore together how to beat those January winter blues, not just for ourselves but for our businesses and brands too.

Embrace the Light, Banish the Blues

Winter blues, often known as Seasonal Affective Disorder (SAD), can cast a shadow over our energy and mood. But fear not! A simple yet effective remedy is to bask in winter blues light. Sunlight, even on the chilliest days, is a natural source of Vitamin D, vital for lifting spirits. Incorporate winter depression vitamin D sources into your daily routine, like a brisk morning walk or by simply sitting near a sunny window.

Meditation: Your Winter Shield

In the quiet moments of winter, meditation becomes a powerful tool. It’s not just about finding peace; it’s a journey to rediscover your inner strength. Meditation to beat the blues can transform winter's silence into a source of profound healing and insight. Light a candle, hold your favorite crystal (amethyst works wonders for tranquility), and let your thoughts flow like a gentle stream.
Picture
Folding Meditation Bench with Velvet Cushion & Carry Bag - Bamboo Yoga Stool, Seiza Prayer Bench, Travel Meditation Seat - Comfortable Kneeling Chair for Mindfulness, Zen Practice Meditation Stool
Picture
El Paso Designs Boho Blanket | Soft Woven Mexican Meditation Falsa | Perfect for Boho Home Decor, Yoga Towel, Patio, Beach Blanket, Sofa, Couch Cover (Pink & Mint)
Picture
Tibetan Singing Bowls Set~ Meditation Sound Bowl hand Hammered in Nepal For Yoga, Meditation, Mindfulness, Healing & Chakra balancing~ (3 inch)
Nutritional Wisdom: Vitamins for the Soul

Nutrition plays a key role in combating the winter blues. Winter blues vitamins like B12, Omega-3 fatty acids, and Magnesium can be game-changers. They’re not just food for the body, but nourishment for the soul. Infuse your diet with vibrant, life-giving foods that are as colorful as they are nutritious.

Feng Shui Your Space

Your environment influences your energy. Winter blues home Feng Shui is about creating a space that's a sanctuary. Rearrange your living area to enhance the flow of positive energy. Introduce elements of nature like plants or stones like clear quartz to amplify harmony and balance.

Sleep: Your Secret Weapon

The link between sleep and mood is undeniable. Winter blues sleep troubles, such as sleep deprivation or depression insomnia, need our attention. Create a bedtime ritual that calms the mind and soothes the spirit. Lavender essential oils or a warm bath before bed can work wonders.

Mindfulness: A Daily Dose of Joy

Mindfulness techniques for winter blues are like daily doses of sunshine for your soul. Simple practices like gratitude journaling or mindful walking can transform your perspective, turning mundane moments into opportunities for joy and connection.

Business Owners: Light Up Your Brand

For business owners and freelancers, beating the winter blues is also about energizing your brand. Purchasing content and branding services or hiring writers can infuse new life into your business during these quieter months. Quality content that resonates with your audience can turn the winter blues into a season of growth and connection.

Healing Services: The Magic Touch

For those seeking a deeper spiritual connection, consider exploring healing services. Whether it's crystal healing or energy work, these practices can align your personal and professional energies, helping you manifest an abundant life.

Take Action: Your Path to Abundance

Remember, the power to change your world, both inner and outer, lies in your hands. Don't let the winter blues define your January. Embrace these practices, share them with your lineage, and watch as the magic unfolds in your life and business.

Join Our Tribe

You're not just a reader; you're family. Our brand is more than a service; it’s a way of life. Dive into our content, explore the comment section, see what you can contribute, and let's walk this path together. Because here, you’re home.

Conclusion

In this article, we've woven together the essence of warmth, light, and healing wisdom to guide you through the winter blues. Whether you're a business owner looking to revitalize your brand, a freelance writer seeking inspiration, or anyone in search of spiritual nourishment, these tips are your stepping stones to a brighter, more vibrant January. Remember, the journey is as beautiful as the destination. Let's make this winter a season of growth, connection, and abundant joy.

*Disclaimer: Crystal and healing interpretations are for informational purposes only. Your results may vary. Be safe and wise on your magical journey.

Last updated 3/19/2025
Shop
Shop
Shop
Shop
0 Comments

Navigating The Dark: Blackout Preparedness In A Tech-Reliant World (Emergency Preparedness List Included)

12/17/2023

0 Comments

 
© Lyn Lomasi; Owner/Shaman/Master Creator at Brand Shamans Content & Creators Community LLC
Picture
In an age where our lives intertwine with technology, the thought of a blackout can be unsettling, as vividly depicted in the disaster movie "Leave The World Behind". As a shamanic guide and a voice in the wilderness of modern chaos, I invite you to explore the essential steps for blackout preparedness. This article isn't just about survival; it's about thriving in times when the lights go out.

Understanding the Impact Of Blackouts: When Darkness Falls 

Blackouts, whether caused by natural disasters or human error, have become a poignant reminder of our vulnerability. From the Northeast Blackout of 2003 to recent power outages across the globe, we've seen how a moment of darkness can turn life upside down, challenging our over-reliance on technology.

Creating Your Blackout Preparedness Supply List: Essentials For The Unlit Times 

Preparation is your beacon of hope. Here's a basic supply list to help you navigate the dark:

  • Battery-Powered Or Hand-Crank Radio
  • Essential Medications
  • Solar-Powered Generator/Power Supply
  • List Of Emergency Contacts
  • Water: At least one gallon per person per day for several days
  • Non-Perishable Food: A three-day supply per person, including easy-to-prepare items.
  • Manual Can Opener: For opening canned food
  • Battery-Powered Or Hand-Crank Radio: To stay updated on emergency broadcasts.
  • Flashlights: Preferably with extra batteries
  • First Aid Kit: Including bandages, antiseptic wipes, pain relievers, and necessary medications
  • Multi-Tool Or Swiss Army Knife: For various utility purposes
  • Sanitation And Personal Hygiene Items: Including soap, toothbrush, toothpaste, sanitary wipes, and all other necessary toiletries
  • Mobile Phone with Chargers: Including a backup power bank or solar charger
  • Important Personal Documents: Copies of insurance policies, identification, and bank account records in a waterproof container
  • Local Maps: In case of GPS or mobile network failures
  • Cash: In small denominations and coins, since ATMs and card machines may be down
  • Emergency Blankets: Compact, mylar space blankets for warmth
  • Clothing: Change of clothes suitable for your climate and sturdy shoes
  • Sleeping Bag Or Warm Blanket: For each person
  • Matches In A Waterproof Container: Or a lighter
  • Whistle: To signal for help
  • Dust Masks And Gas Masks: To filter contaminated air
  • Plastic Sheeting And Duct Tape: For sheltering in place
  • Life Straws Or Other Small Filtering System: To disinfect water
  • Fire Extinguisher: Small, multipurpose type
  • Wrench Or Pliers: To turn off utilities
  • Extra Batteries: For all battery-powered devices
  • Solar-Powered Or Battery-Operated Lantern: For lighting.
  • Portable Cooking Stove And Fuel: For preparing hot meals.
  • Fully-Stocked RV: Include the usual, plus the above items. The RV will be needed if being mobile is necessary
  • Solar RV Battery Charging System And Solar Panels For Power
  • Extra Vehicle Fuels, Liquids, And Maintenance Tools/Supplies
  • Valuable Supplies And Resources: To be able to trade if cash becomes irrelevant
  • Defensive Supplies: (knives and other personal protection), in case of attacks
  • Bugout Bag/Survival Backpack For Each Person: In case the RV needs to be evacuated and you’re on foot

Get Your Mindset Right: Being Confident And Prepared Can Go A Long Way

Meditate daily and practice other mindset techniques along with preparedness skills. Combining both skill and mindset will help you gain the confidence needed, should a disaster strike. When you know that you are prepared with supplies, skills, and a balanced mind, you can handle just about anything that comes your way. 

The Illusion Of Constant Connectivity: When Tech Fails, Self-Reliance Prevails 

Our dependency on technology, while convenient, can be our Achilles' heel. A blackout is a stark reminder of the importance of being self-reliant. Learning basic survival skills, training for self-defense, understanding traditional navigation methods, and nurturing a mindset of resilience can be life-saving.

Lessons from Past Disasters: Learning from the Shadows 

Reflecting on past blackouts and similar disasters teaches us about preparedness, community strength, and the human spirit's resilience. These events are not just cautionary tales but blueprints for building a more resilient future.

Conclusion: As we traverse this tech-savvy world, let's not forget the basics of survival and the power of human ingenuity. Preparing for a blackout goes beyond having supplies; it's about cultivating a mindset ready to face any challenge, lit or unlit.

Start your blackout preparedness today! Gather supplies, learn essential skills, and remember, in times of darkness, your spirit can be the brightest light.

Disclaimer: The advice given here is for general informational purposes. Each situation is unique, and your actions should be tailored to your specific context.

Last updated 3/19/2025

Picture
Survival Kit, 250Pcs Survival Gear First Aid Kit with Molle System Compatible Bag and Emergency Tent, Emergency Kit for Earthquake, Outdoor Adventure, Hiking, Hunting, Gifts for Men Women
Picture
LifeStraw Personal Water Filter for Hiking, Camping, Travel, and Emergency Preparedness
Picture
ECO-WORTHY 10W Solar Car Battery Charger Maintainer 12V Waterproof Solar Panel Portable Solar Trickle Charger for Car Truck Boat Lawn Mower RV Trailer Tractor ATV Utility Vehicle Battery
Picture
Augason Farms Breakfast and Dinner Variety Pail Emergency Food Supply Everyday Meals 4 Gallon Pail
0 Comments

How To Remove Tea Stains Naturally With Eco-Friendly Cleaning Solutions

11/17/2023

0 Comments

 
©Lyn Lomasi; Owner|Ordained Shaman atIntent-sive Nature &Brand Shamans Content Community LLC
Picture
Did you know that the magic of nature holds the key to banishing tea stains effortlessly? Whether it's your favorite outfit, cherished countertops, or beloved furniture, tea stains don't have to be a permanent mark. Embrace an eco-friendly approach, just like I do in my natural, harmonious lifestyle, and explore the potent yet gentle methods Mother Nature offers for tea stain removal.

Naturally Banish Tea Stains from Clothing: Begin with a simple cold water rinse for fresh tea stains on clothing. If that doesn't suffice, turn to the wisdom of vinegar. Mix equal parts vinegar and water in a sink, and let your garment soak in this natural elixir. Add eco-friendly liquid detergent for stubborn stains, and use a touch of gentle scrubbing if needed. For the most persistent tea marks, invoke the power of baking soda under a layer of vinegar, dabbing the tea stain into submission, and finishing with a cold rinse.

Easily remove tea stains from your favorite outfits with these simple steps:

  1. Cold Water Rinse: Quickly run the tea-stained area under cold water. Often, this quick action is all you need.
  2. Vinegar Rinse Magic: For persistent tea stains, prepare a sink with equal parts vinegar and water. Submerge the garment, swirling it gently. A rinse in cold water usually does the trick!
  3. Eco-Friendly Detergent Boost: For tougher tea stains, add some green liquid detergent to the mix. Gently rub it into the stain and repeat the rinsing process until the stain vanishes.
  4. Baking Soda & Vinegar Duo: For the most challenging tea stains, place a dry cloth under the stained area, sprinkle baking soda, and add a touch of vinegar. Dab with another dry cloth – watch the tea stain transfer!

Eco-Friendly Remedies for Carpet and Furniture Tea Stains: Carpet and furniture tea stains meet their match with a blend of vinegar, baking soda, and the power of natural solutions. Create a half vinegar, half water mix in a spray bottle, and apply it over a sprinkle of baking soda on the tea-stained area. Witness the tea stain lift as you dab with a dry cloth, repeating as necessary. Finish with a dab of cold water and dry thoroughly.

Remove tea from your carpets and furniture with these eco-friendly steps:

  1. Mix vinegar and water in a spray bottle.
  2. Sprinkle baking soda on the stain, then spray the vinegar solution. 
  3. As it bubbles, dab the stain away with dry cloths. 
  4. Repeat as needed, then rinse with a damp cloth and dry thoroughly.


Revitalize Kitchen Surfaces Naturally: For kitchen counters, stove tops, and floors, the same vinegar-water potion works wonders for removing tea stains naturally. Begin with a simple spray and wipe. If the stain persists, summon the effervescent power of baking soda combined with your vinegar solution. Remember, swift action is key on hardwood surfaces to prevent water damage.

Remove tea and keep your kitchen surfaces spotless with these natural methods:

  1. Floor Care Solution: Use the same vinegar-water solution. Spray and wipe the tea away with a dry cloth for initial treatment.
  2. Baking Soda Lift: For persistent tea stains, add baking soda, then spray again. Dab away the lifted tea stain.
  3. Quick Hardwood Care: If you have hardwood floors, act fast and dry thoroughly to prevent water damage.

In every step, remember that you're not just cleaning up spilled tea - you're aligning with the rhythms of nature, infusing your surroundings with eco-conscious care, and preserving the planet for future generations. Follow these shaman-guided steps and transform your space with the wisdom of the earth.
0 Comments

Essential Oils and Scalp Massage: Your Hair Growth Dynamic Duo

9/9/2023

0 Comments

 
© Lyn Lomasi; Owner|Ordained Shaman at Intent-sive Nature & Brand Shamans Content Community LLC
Picture
In the quest for longer, healthier hair, there's a magical duo that can transform your mane dreams into reality: essential oils and scalp massage. Prepare to embark on a journey of hair growth, armed with the power of nature and the art of massage. Not only will you manifest beautiful hair length, but you'll also empower the next generation to do the same.

Imagine a world where your hair flows like a cascading waterfall, exuding vitality and beauty. This world is within your reach, and the path to it starts with a simple but powerful duo: essential oils and scalp massage.

Essential Oils for Hair Growth

Essential oils are nature's gift for hair health. They stimulate hair follicles, increase circulation to the scalp, and promote the conditions for growth. Oils like lavender, rosemary, and cedarwood are your secret weapons for luxurious locks.

Scalp Massage: The Art of Stimulating Growth

Scalp massage is more than just a relaxing indulgence; it's a hair growth powerhouse. As you massage your scalp, blood flow to the hair follicles increases, ensuring they receive essential nutrients. This nurturing environment encourages hair to grow stronger and longer.

Oils That Make Hair Grow Faster

If you're eager to accelerate hair growth, consider creating an essential oil blend. Combine a few drops each of lavender, rosemary, and cedarwood essential oils with a carrier oil like coconut, almond, or jojoba. This potent elixir will invigorate your scalp and stimulate hair growth. If you don’t like making your own, find a good blend that contains all of those ingredients without chemicals added. 

Essential Oils Good for Hair Growth

Let's dive into the magic of essential oils:

  1. Lavender: Known for its calming aroma, lavender oil also promotes hair growth and reduces hair loss.
  2. Rosemary: This powerhouse oil increases cellular metabolism, promoting hair thickness and reducing hair loss.
  3. Cedarwood: Cedarwood oil balances oil production, perfect for those with oily scalps, and stimulates hair follicles.

Manifest Beautiful Hair Length

It's not just about hair; it's about confidence and empowerment. As you manifest beautiful hair length, you'll inspire those around you, including your children, to embrace the journey to healthy, vibrant hair.

The Dynamic Duo Ritual

Here's how to put this dynamic duo to work:

  1. Find A Good Hair Growth Blend: Look for a  hair growth blend that contains rosemary, lavender, and cedarwood, along with other growth ingredients. Being customized to your specific hair is even better. 
  2. Prep Your Scalp: Before applying the blend, ensure your scalp is clean. Use a gentle, sulfate-free shampoo to remove buildup.
  3. Application: Part your hair and apply the oil blend directly to your scalp. Use gentle, circular motions to massage in the oil.
  4. Massage Technique: Use the pads of your fingers to massage your scalp for 5-10 minutes. Focus more heavily on areas where you need the most growth.
  5. Wrap It Up: After your massage, cover your hair with a warm towel or shower cap. This creates a cozy environment for the oils to work their magic.
  6. Wash and Rinse: Leave the oil on for at least 30 minutes or overnight, then shampoo and rinse as usual.

Empowering the Next Generation

Teach your children the beauty of self-care and hair health. Involve them in the scalp massage ritual and show them the wonders of essential oils. As they witness your journey, they'll learn to embrace their own.

In Conclusion

The path to luscious, flowing locks is not a distant dream; it's a reality you can manifest. Essential oils and scalp massage are your trusted companions on this journey. Empower yourself and inspire your children to embrace the art of hair growth and self-care.

Take immediate action today, and watch your hair flourish with vitality. Your destiny is in your hands, and the dynamic duo of essential oils and scalp massage is your key to unlocking the beauty of abundant, stunning locks.

Dragon Essence Sacred Healing Custom Hair Growth & Restoration Oil

Shop
0 Comments

The Magic Ambience of Throw Pillows for Bedroom Decor

8/26/2023

0 Comments

 
© Lyn Lomasi; Owner|Ordained Shaman at Intent-sive Nature & Brand Shamans Content Community LLC
Picture
Are you ready to transform your bedroom into a haven of beauty and comfort? Discover the captivating ambience of throw pillows and unlock the secrets to manifesting a beautiful bedroom that radiates with enchantment and warmth.

The Art of Bedroom Transformation

In the realm of home decor, the smallest details often wield the most potent magic. Among these, throw pillows stand out as versatile gems that can effortlessly elevate the aesthetics of your bedroom. A canvas for creativity, a comfort haven, and a tool for manifestation, throw pillows possess an enchanting power to weave wonders within your personal space. Let's delve into the captivating world of throw pillows for bedroom decor and unlock the secrets to manifesting a beautiful and mesmerizing haven.
The Allure of Throw Pillows

Imagine entering your bedroom and being greeted by a burst of colors, textures, and patterns that resonate with your soul. This is the magic that throw pillows bring to the table – or rather, the bed. These charming accessories possess an innate ability to captivate the eyes and the heart. Whether you're going for a minimalist chic look or a vibrant bohemian paradise, throw pillows are your artistic tools to orchestrate a symphony of style within your bedroom.

Mastering the Art of Throw Pillow Alchemy

Now, let's get to the nitty-gritty of using throw pillows to manifest a beautiful bedroom that exudes your unique personality and aspirations. Imagine that your plain bed suddenly transforms into a luxurious nest with a combination of beautiful pillows, exuding an air of opulence. By thoughtfully selecting pillows with various colors, patterns, and sizes, you create a visual tapestry that sparks intrigue and invites comfort. Layering pillows of different sizes and shapes can add depth to your decor, making your bed a sanctuary of style and solace.
The Bedroom Manifestation Ritual

Here comes the magical twist – throw pillows can become your tools of manifestation. Infuse your bedroom with the energy of your desires by selecting pillows that reflect your aspirations. If you long for tranquility, opt for soothing shades of blue or serene patterns. For those craving adventure, vibrant and daring designs can amplify the spirit of wanderlust. Looking for your twin flame? Add throw pillows with love and twin flame patterns and energy. As you arrange these pillows with intention, you're aligning your space with your dreams, crafting an environment that supports your aspirations and nurtures your soul.
Embrace the Pillow Revolution

Take action and embrace the transformative power of throw pillows for your bedroom decor. Don't just stop at your own bedroom – empower your kids to take charge of their spaces too! Teach them the art of selecting pillows that reflect their personalities, passions, and dreams. Let them experience the magic of creating their own havens of imagination and comfort.
Conclusion: Unleash Your Bedroom's True Potential

In a world where you can design your reality, your bedroom becomes a canvas of manifestation. Throw pillows are the magical brushes that allow you to paint your desires and dreams onto the fabric of your life. As you embrace the enchanting allure of throw pillows, you're not merely decorating your bedroom; you're crafting a space that resonates with your soul's longing. So go ahead, manifest your beautiful bedroom, and inspire your kids too! With throw pillows, you hold the key to unlocking the magic within your personal space – a magic that reflects your unique journey, aspirations, and the endless potential of your future.
0 Comments

Mastering the Art of Throw Pillows and Blankets: Your Guide to a Stylishly Welcoming Home

8/6/2023

0 Comments

 
by Lyn Lomasi; Owner & Ordained Shaman at Intent-sive Nature & Brand Shamans Content Community LLC
Picture
Welcome, home enthusiasts and decorating aficionados! If you're ready to elevate the ambiance of your living space to the next level, it's time to dive into the world of throw pillows and blankets. These functional yet stylish home decor elements have the incredible power to create a warm and inviting atmosphere in any room. With these expert tips and mindful approach, you'll master the art of mixing and matching throw pillows and blankets to achieve a welcoming home that exudes zen-like harmony.

The Magic of Throw Pillows

Throw pillows are more than just fluffy accessories; they’re the key to unlocking the potential of your living space. Their versatility allows you to express your personality, elevate your decor, and make a statement without uttering a single word. The first step in your throw pillow journey is to select the right size, shape, and texture.

Bold Power Move: Experiment with different pillow sizes, such as 18x18 inches, 20x20 inches, or even oversized 24x24 inches, to add drama and depth to your sofa or bed.

Pro Tip: Don't be afraid to play with textures—mix plush velvet, natural linen, and smooth silk to create a tactile delight.
Decoding the Art of Throw Blankets

Blankets are the cozy companions that wrap you in warmth, but they also serve as stylish focal points in your home decor. Whether draped casually over the arm of a chair or elegantly spread across your bed, throw blankets can instantly transform a room.

Bold Power Move: Opt for throw blankets in various patterns, like herringbone, chevron, or geometric prints, to infuse a touch of contemporary flair into your space.

Pro Tip: Embrace the magic of layering by pairing a chunky knit throw with a lightweight cotton blanket—your guests won't be able to resist the allure of your visually captivating decor.


The Mindful Art of Mixing and Matching

Now that you've chosen the perfect throw pillows and blankets, it's time to combine them artfully to create a cohesive and welcoming environment.

Bold Power Move: Think in odd numbers. Arrange your throw pillows in groups of three or five for an aesthetically pleasing and harmonious arrangement.

Pro Tip: Experiment with color palettes—try blending complementary colors like teal and orange or soothing neutrals like beige and cream for a harmonious look.

DIY Decorating: Unleash Your Inner Designer

Decorating your home with throw pillows and blankets doesn't mean breaking the bank. Embrace your inner DIY guru and get creative!

Bold Power Move: Transform plain throw pillows with fabric paint, stencils, or iron-on patches to add a personalized touch to your decor.

Pro Tip: Don't shy away from repurposing old blankets or scarves as unique throw blankets—a touch of nostalgia will only enhance the welcoming atmosphere.

Achieving Zen-like Serenity

Creating a welcoming home is not just about aesthetics—it's about crafting a serene and mindful environment.

Bold Power Move: Introduce throw pillows with inspiring quotes, meaningful symbols, or affirmations to infuse positivity and mindfulness into your daily life.

Pro Tip: Opt for eco-friendly materials like organic cotton or sustainably sourced wool for your throw blankets—a conscious choice that will bring you peace of mind.


Putting Things Into Action

Now that you're armed with the knowledge and inspiration to mix and match throw pillows and blankets, it's time to unleash your creativity and elevate your home decor to new heights.

Bold Power Move: Head to your favorite home decor store or scour online marketplaces to find the perfect throw pillows and blankets that speak to your style and vision.

Pro Tip: Start experimenting and rearranging your throw pillows and blankets right away, and let your imagination take flight.

Conclusion

The art of mixing and matching throw pillows and blankets is well within your grasp. With a touch of DIY magic, a dash of style, and a mindful approach, you'll transform your home into a welcoming haven of zen-like serenity. So go forth and embrace the power of throw pillows and blankets to create a space that embodies your unique personality and exudes undeniable charm. Happy decorating!

Remember, creating a welcoming home is a journey, and it starts with your creative flair and the right throw pillows and blankets by your side. Get ready to unlock the full potential of your living space and let your inner designer shine. Your stylishly welcoming home awaits!
0 Comments

Revamp Your Backyard: Master the Art of Creating a Stylish and Functional Outdoor Kitchen

7/31/2023

0 Comments

 
byLyn Lomasi; Owner & Ordained Shaman atIntent-sive Nature &Brand Shamans Content Community LLC
Picture
Are you tired of the same old backyard setup? Ready to transform your outdoor space into a stylish and functional oasis? Look no further! In this guide, we will empower you with all the knowledge you need to create a stunning outdoor kitchen that leaves your guests in awe.

Unveiling the Vision: Embrace the Outdoor Kitchen Revolution

Step into the future of outdoor entertainment with an innovative and stylish outdoor kitchen. Whether you're a DIY enthusiast or prefer hiring a skilled contractor, this guide has got you covered. We understand that your outdoor space is an extension of your personality, so why not make it truly unique?


1. Delight in Functionality: Plan and Design Like a Pro

Creating a functional outdoor kitchen is the foundation for a remarkable experience. Before diving in, consider the space available, your cooking preferences, and how you envision the flow of your gatherings. By thinking like a pro, you'll design a space that's easy to use, efficient, and perfect for your lifestyle.

2. DIY vs. Contractor: Which Path Should You Take?

Deciding whether to embark on a DIY journey or hire a seasoned contractor is crucial. While the DIY route lets you add a personal touch, a professional contractor brings unmatched expertise to the table. Weigh the pros and cons based on your skills, budget, and time availability, then make a confident decision.
3. Elevate Your Kitchen's Aesthetics: Style Meets Substance

Now comes the fun part – adding that stylish flair to your outdoor kitchen! Incorporate elements that reflect your personality and complement your home's architecture. From rustic charm to modern chic, let your creativity shine as you build a space that's a perfect blend of style and substance.

4. Must-Have Features: The Essentials for an Exquisite Outdoor Kitchen

No outdoor kitchen is complete without the must-have features. Equip your kitchen with high-quality appliances, ample counter space, smart storage solutions, and suitable lighting to create a haven for culinary adventures.


5. Materials Matter: Unveiling the Best for Outdoor Kitchen Construction

Choosing the right materials is paramount to ensure your outdoor kitchen stands the test of time. From weather-resistant countertops to durable flooring, our guide will help you make the right decisions to guarantee your kitchen's longevity.

6. DIY with Confidence: The Art of Building Your Outdoor Kitchen

For the ambitious DIY enthusiasts, we present a step-by-step guide to building your outdoor kitchen with confidence. From laying the foundation to installing appliances, this section will empower you to take on the challenge like a pro.

7. Contractor’s Touch: Benefits of Seeking Professional Expertise

Entrusting your outdoor kitchen construction to a professional yields numerous advantages. Discover the benefits of hiring a seasoned contractor, from reducing construction time to accessing superior craftsmanship.

8. Safety First: Ensuring a Secure and Enjoyable Outdoor Kitchen

Prioritize safety without compromising style. Learn how to implement safety measures such as proper ventilation, fire-resistant materials, and smart appliance placements to guarantee a worry-free cooking experience.

9. Personalize and Enhance: Tailoring Your Outdoor Kitchen Experience

Go the extra mile by personalizing your outdoor kitchen with unique touches. Incorporate seating arrangements, decorative elements, and functional add-ons that bring out your personality and create a welcoming ambiance for your guests.

10. Time to Take Action: Embark on Your Outdoor Kitchen Journey

The journey to creating a functional and stylish outdoor kitchen starts now. With the knowledge and confidence gained from this guide, take immediate action and make your dream outdoor kitchen a reality!

In conclusion, a remarkable outdoor kitchen is within your grasp. By combining functionality with style and leveraging the expertise of professionals or your DIY prowess, you'll create a space that elevates your home and enhances your lifestyle. So, are you ready to unlock the true potential of your backyard? Embrace the transformation and let your outdoor kitchen become the talk of the town!

Remember, the key to success lies in planning, taking action, and never settling for less. A bold and powerful outdoor kitchen awaits - seize the opportunity today!
0 Comments

5 Reasons Your Scalp is Itchy and How to Achieve Zen-Like Harmony with Natural Ethnic Hair Care

7/28/2023

0 Comments

 
© Lyn Lomasi; Owner|Ordained Shaman at Intent-sive Nature & Brand Shamans Content Community LLC
Picture
If you're constantly scratching at your head, it's time to embark on a metaphysical journey to discover the root cause of this pesky issue. Let go of the myth that your scalp is destined to be dry just because you have ethnic hair. Embrace the wisdom of natural hair care, and let your scalp and hair flourish in harmony. Here are five reasons your scalp may be dry and itchy, along with the path to achieving scalp nirvana.

1. Not Shampooing Enough: Finding the Balance

The key to achieving scalp enlightenment lies in finding the delicate balance between over-shampooing and under-shampooing. Ethnic hair tends to be drier, making less frequent shampooing necessary. However, neglecting to cleanse your scalp regularly with a good, natural shampoo can lead to a buildup of dirt and natural hair oils, causing the relentless itchiness you seek to escape.

The Wisdom: Embrace a ritual of cleansing your scalp with a gentle, sulfate-free, natural shampoo. Aim for a harmonious schedule that respects your hair's natural moisture while washing away impurities, ensuring your scalp feels refreshed and rejuvenated.

2. Not Conditioning Properly: The Art of Nourishment

As you walk the path of natural hair care, you must remember to nourish not only your soul but also your strands. Insufficient conditioning can leave your hair feeling dry, brittle, and ultimately lead to a discontented scalp.

The Wisdom: Embrace the art of proper conditioning. Choose a nourishing, natural hair conditioner, free of alcohol and sulfates. Massage it into your hair, infusing each strand with the elixir of moisture. Allow it to sit for a few minutes, using this time for meditative reflection. Rinse thoroughly and feel the soothing embrace of well-nourished hair and a contented scalp.

3. Not Moisturizing Correctly or Enough: A Journey to Hydration

In your quest for scalp harmony, hydration is a fundamental pillar of wisdom. Ethnic hair tends to be more prone to dryness, and inadequate moisturization can lead to a parched and itchy scalp.

The Wisdom: Discover the art of moisturization by choosing natural hair care products enriched with hydrating botanicals. Regularly apply leave-in conditioners or hair oils, delicately massaging them into your scalp and tresses. Embrace the divine sensation of moisture seeping into your hair, quenching its thirst, and soothing your itchy woes.

4. Unknown Allergies: Unveiling Hidden Truths

Sometimes, the path to scalp enlightenment involves exploring the realm of unknown allergies. Sensitivities to certain ingredients in hair care products can disrupt your journey to harmony.

The Wisdom: Engage in self-discovery by examining the ingredients in your hair care arsenal. Seek products with clean, natural, and hypoallergenic formulations. Embrace a holistic approach, and keep a journal to document your findings. By unveiling hidden truths, you can eliminate potential allergens, allowing your scalp and hair to breathe freely.

5. Scalp Conditions: Confronting Inner Imbalances

In rare instances, persistent scalp itchiness may be attributed to specific scalp conditions. Seborrheic dermatitis, psoriasis, or eczema can disrupt your peace of mind.

The Wisdom: Seek professional guidance and support on your journey, if necessary. Consult a holistic dermatologist or trichologist to determine the root cause of your scalp issues. Embrace natural remedies and specialized treatments from an herbalist to restore balance and serenity to your scalp.

As you navigate the metaphysical realms of natural hair care, remember that harmony comes from within. Embrace the wisdom of proper cleansing, nourishment, hydration, and self-discovery. In this pursuit, let us be your guide—an oasis of natural hair care products and customized hair care that resonates with your journey. Together, we shall uncover the path to scalp nirvana, where your itchy woes shall fade away, leaving you with hair that flows in harmony with your soul.

Dragon Essence Sacred Healing Custom Hair Growth & Restoration Oil

Shop

Handcrafted Cleanse & Restore Conditioner

Shop
0 Comments

Wow Guests With 3 Magical Salt And Pepper Shaker Sets

5/12/2023

0 Comments

 
byLyn Lomasi; Owner & Ordained Shaman atIntent-sive Nature &Brand Shamans Content Community LLC
Picture
Did you know that salt and pepper shakers can be magical and fun? I took a  little online trip to Amazon and found these 3 magical duo shakers that will wow your guests. From star fairy to Gothic or fantasy dragon, your table settings will forever be enchanting once you grab these duo shaker sets!
Dragons Magnetic Salt And Pepper Shaker Set

What's more magical than a dragon? Two fiery dragons! This whimsical duo shaker set comes with a red and black matching fire dragon. You might the pepper in the black shaker and the salt in the red. What's more, they are magnetic, ensuring they stay by each other's side when not in use. Dragons are eternal, afterall. These twin flames don't disappoint.
Duo Salt And Pepper Shaker Magic Wands

Feeling magical? Cast a taste spell on your food using these cute and fun duo salt and pepper shakers shaped like wands. The salt shaker is a white star fairy wand and the pepper wand is black.
Quoth The Raven Gothic Salt And Pepper Shaker Set

This Gothic salt and pepper shaker is sure to turn heads. The skull head salt shaker is labeled with "Quoth The Raven". Next, the pepper shaker is a raven featuring the quote "Nevermore". If this Gothic duo shaker set doesn't have folks doing an improv skit or reading aloud famous literature at dinner parties, I don't know what will. 
0 Comments

Your Room Can Vibe  High With This Blue Spiritual  Wisdom Collection

9/11/2022

0 Comments

 
by Lyn Lomasi; Owner of Intent-sive Nature & Brand Shamans Content Community
Picture
If you're looking for a way to refresh your room and upgrade to a more healing experience, this Blue Spiritual Wisdom home decor collection can help you vibrate higher.

Add Some Healing To Any Room

Promote the healing experience with the tone of blue featured in every piece. The way the pattern flows is the perfect aesthetic prior to a healing waters or other healing meditation. Lighting candles, like the Blue Spiritual Wisdom Jar Candle is also a good healing activity to promote relaxation. Some may also use candles in healing rituals and meditations. Your room decor can be an important part of how you feel during meditation.

Feel The Wisdom

Studying this pattern can help you vibrate higher as you become aware of the messages within. The eye of wisdom is prominently featured in this home decor collection, as are many other symbols of wisdom and healing, such as the sun, the unicorn, water, and many more. Your soul will respond in the way it should with whatever is meant specifically for you.

Relax and Release

Life can be stressful. Your home should be your sanctuary from all the chaos. Focus on the Blue Spiritual Wisdom Framed Poster or cuddle up with the super soft Blue Spiritual Wisdom Throw Blanket while laying back on one or more of the Blue Spiritual Wisdom Premium Throw Pillows. Relaxation can help promote healing and peace. When you have peace within your home, it's much easier to find your inner wisdom.

Display Your Power

Part of staying in your power involves putting it on display for yourself and others. Express yourself within your home decor using this beautiful healing and wisdom collection. The Blue Spiritual Wisdom collection is exclusive to Intentsive Nature.
0 Comments

Resources and Tips for Gardening With Kids

11/8/2016

 
by Lyn Lomasi, Write W.A.V.E. Media Staff
Picture
Image © Lyn Lomasi; All Rights Reserved
Many kids love to garden. Not only do they enjoy it, but they can be pretty good at it too. My own children do most of the gardening at our house. They prefer it that way. Here's some great tips and resources for gardening with kids.

Invest in a Good Wheelbarrow

Not only will kids enjoy pushing around the wheelbarrow, but generally, the natural soil isn’t good enough to plant in. This means that the kids will need to transport different types of soil. A wheelbarrow is the easiest and most fun way for kids to do this.

Use Colorful Plants

Kids love bright colors. Choose plants with a variety of colors, rather than selecting only one or two colors. This will make the gardening more fun for the kids.

Choose Simple to Grow Plants

Not all plants are easy to grow. Kids get excited to see their gardening results. Choosing plants that are simple to grow will help increase the odds of favorable results.

Choose Native Plants

This goes along with the last point. By selecting plants that are native to your area, this can make the plants easier for kids to grow.

Create a Maintenance Schedule

Creating a schedule of when to feed and water plants can help kids keep track of what needs to be done in the garden. I suggest hanging it near their chore chart if they have one.

Healthier Ways to Lighten Ethnic Hair

9/14/2016

0 Comments

 
© Lyn Lomasi; Owner|Ordained Shaman at Intent-sive Nature & Brand Shamans Content Community LLC
Picture
Lightening your hair with some highlights or throughout is a fun way to get a new look. But bleaches and lighteners can sometimes be harsh on your hair, with lasting effects. What some people don’t know is that there are some effective natural lightening methods that work on all types of hair. Get the lighter look you want with these healthier ways to lighten ethnic hair.

Prepare Your Hair for Lightening

Before lightening your hair, some advanced preparation is necessary. Make sure your hair is clean, dry, and does not contain any product. This way, the lighteners will not react with any of the ingredients that your regular hair products contain. It is recommended to shampoo only with a good non-chemical shampoo to remove all oils and other residue. Leave conditioning for afterward, as the conditioner may also interfere with the process.

Be sure to wear clothing that you don’t mind being damaged, as some of these lighteners may have a bleaching effect on clothing as well.

Lemon Juice Hair Lightening Spray

This mixture can lighten your hair significantly. Therefore, it is recommended to only use this method if you are looking for a dramatic lightening effect. For naturally dark shades, expect this to create a light brown to brownish blonde highlighted look. The lighter your hair is when you start, the lighter it will be when you finish the process. If your hair is colored or lightened, measure the results by the tone of the current color.

To prepare this lightening spray, you will need one spray bottle, a bottle of distilled water, and a bottle of lemon juice from concentrate. Blend the water and lemon juice half and half in the spray bottle. Shake to mix it thoroughly. Once the mixture is made, spray it onto dry hair and brush through until the hair is saturated. Leave it on until the hair is lightened as desired. Going out in the sun will help speed the process. Leave the hair down so that it is exposed to the elements. Do not leave the mixture on for more than a couple hours, to avoid excessive dryness.

Rinse the hair thoroughly. Do not shampoo. Apply a good conditioner to the hair and scalp and use only oils to soften and style for the first 24 hours. After this, you can style as usual. This is to help seal in moisture and avoid dryness and irritation. Do not use this method on hair that has been chemically treated recently, as it may cause dryness and breakage.

Apple Cider Vinegar Hair Lightening Rinse

The effects of this lightening rinse can vary from person to person. On darker hair, it may simply result in bringing out natural highlights. For the best results, the recommended distilled water is a must. Vinegar is good for deep cleansing and softening your hair. Therefore, this method has added bonuses.

To create this hair lightening rinse, combine half apple cider vinegar and half distilled water in a large bowl. After your hair has been shampooed and conditioned, rinse it with this mixture, rubbing and making sure that it gets into all of the hair. Leave the rinse on the hair, as it is a rinse and not a solution. Do this frequently to slowly lighten your hair or bring out natural highlights. Style as usual, paying extra attention to your usual moisturizing process.

Chamomile Tea Hair Lightening Rinse

When lightening your hair with chamomile tea, expect to bring out natural highlights. The effects will occur most obviously in areas that are naturally lighter. This is simply a way to further highlight what you already have naturally. On some people, other areas may lighten slightly as well.

To create this lightening rinse, make a pitcher of chamomile tea (any brand will do, as long as it is 100% chamomile tea). Once the tea is brewed well, chill it until it’s cold. After shampooing and conditioning the hair, rinse thoroughly with the tea. Do not rinse the tea off. Repeat regularly for the best results over time. Style as usual, making sure to moisturize well.

Hair Lightening After-Care

Remember that lightening your hair is an extra process your hair is being put through, even when the process is natural or healthier than other options. Even though alternative methods may be safer, you should still give extra care to your hair to help avoid dryness and breakage. Follow the after-care styling and conditioning instructions included with each method for the best results. Be sure to also condition the ends and provide extra hair oil on them to help prevent breakage.

Article last updated 7/28/2023

Dragon Essence Sacred Healing Custom Hair Growth & Restoration Oil

Shop

Handcrafted Cleanse & Restore Conditioner

Shop
0 Comments

Teaching Tweens How to Properly Care for Their Hair

9/14/2016

0 Comments

 
© Lyn Lomasi; Owner|Ordained Shaman at Intent-sive Nature & Brand Shamans Content Community LLC
Picture
Proper hair care starts when kids are babies. But tweens will usually start showing interest in caring for their hair themselves. This is a necessary skill. It especially comes in handy for when the kids are not with you, such as at school or at a friend's house. Whether their hair needs some extra maintenance or a full-on routine, tweens need to know how to properly care for their own hair.

Show them by example. The first step in teaching tweens to properly care for their hair is as simple as caring for your own. When they have a good example to follow, it's much easier to get the point across. On the other hand, if your hair is mess, why would they trust that what you have to say about hair care is correct?

Anything you are telling them to do is something you should also be doing yourself. My kids already know that if I am telling them something about hair care, I have either been doing that myself with my own hair or theirs. If your family has various hair types, like in ours, make sure they understand which things you cannot do with your own hair, but that are great for theirs.

Always have the proper supplies within reach. It's much easier to keep up a hair care routine if your tween has easy access to the supplies. Don't make her search for the basic supplies needed, like a brush, comb, shampoo, conditioner, or hair accessories. Everything your tween needs to style his hair should be in a convenient location for him. This will avoid frustration for everyone.

You may be thinking about hair products that could be toxic. We have a general rule about toxicity in our house. If something's toxic enough that you'd worry about the kids using it without you, it doesn't belong in the house anyway. We generally purchase or make our own hair care products that use only natural and safe ingredients.

Make it a part of the daily routine. There should be a set time for your tween to maintain her hair each morning. She should also know that even if she brushes and styles her hair at that time, there may be extra maintenance throughout the day. Most hairstyles will have to be adjusted at some point during the day. Knowing to do this will also help your tween feel more confident at school and in other public places.

Explain the purposes of each item. While you may think it is obvious, there are some things your tween needs an explanation for. He may know what the item is, but does he know the purpose of it as well as why it needs to be done?

For instance, myself and two of the kids use Intent.sive Etheric Custom Hair Growth & Restoration Oil in our hair care routine. For us, it helps keep frizz under control, reduces breakage, prevents dandruff and dry scalp, and more. They may know the routine and that a particular item is part of it, but let them know the reason that routine is in place.

Teach them easy hairstyles. If you expect your tween to maintain proper hair care, simple styles must be taught. Of course you can also teach them elaborate hair styling techniques. But start with the basics and make sure they have plenty to choose from. This makes it easy for them to get ready in the morning. It also will help if their style comes loose at school and they need to improvise.

Girls lose their ponytail fasteners often. Make sure they know how to style their hair both with and without accessories. My tweens know how to style their hair so well that they prefer to always do it themselves.

Explain what happens to hair not properly cared for. Not only do tweens need to understand what happens when they style their hair, but they also need to understand what happens when they do it incorrectly. Show them what non-managed hair looks like, if possible. Talk about how people can go bald, get knotted up hair, split ends, and more when the wrong products are used or when nothing is done at all.

Have them look in the mirror when they first wake up and ask them if they would go to school that way. If they are homeschooled, like mine, instead ask them if they would go meet their friends that way or go to a sports practice or library like that. When they can visibly compare well kept hair to that which isn't, they may better comprehend why proper hair care is so important.

Dragon Essence Sacred Healing Custom Hair Growth & Restoration Oil

Shop

Handcrafted Cleanse & Restore Conditioner

Shop
0 Comments

10 Essential Uses for Pure Lemon Oil

11/1/2015

0 Comments

 
by Lyn Lomasi; Owner of Intent-sive Nature & Brand Shamans Content Community
Picture
Image © Alexander von Halem; Flickr.com
Various essential oils are known for a variety of medicinal and aromatherapy properties. Lemon  essential oil is no different. In fact, more uses are being discovered all the time. Here are ten of the most common household and medicinal uses for lemon essential oil, accompanied by  instructions on how to use the oils for each. Orange oil and other citrus oils have some of the  same uses as lemon oil. However, lemon oil seems to be more effective.

Respiratory Ailments

Lemon essential oil can be used in conjunction with a steam  inhalation treatment for wheezing, colds, cough, and other upper respiratory problems. Note  that this should not be used in those with asthma.

To take a steam inhalation treatment  with lemon essential oil, fill a large bowl or pan with boiling hot water and a few drops of lemon  essential oil. Place the afflicted person's head over the bowl and then place a towel over the  head and bowl (in a tent-like fashion), so that no steam escapes.

The person should take a few  deep breaths, breathing the vapors in deeply for a couple minutes. If at any time, the treatment  causes you to feel uncomfortable, stop right away. Be careful to not get burned by the water from spills or beng too close to the bowl. As with any medical treatment, contact a  licensed medical professional before starting any medical treatment.

Disinfectant

Lemon is a disinfectant and can be used as a deodorizer, neutralizer, and air sterilizer. Simply add a few drops of the lemon essential oil to a spray bottle filled with water. The same concoction can  also be sprayed onto tables, counter tops and other surfaces. Test an inconspicuous area on the surface before use by adding a small amount and waiting 24 hours for the effect (if any). The oil can be good for many surfaces, but it also could damage some.

Mouthwash

Lemon essential oil can be used as a mouthwash. Add a couple drops to a 4 oz glass of water  and gargle. The disinfectant properties are great for germs in the mouth and for neutralizing bad  breath odors, as well.

Energy

For a quick, refreshing energy boost, combine a couple drops each of lemon essential oil and  peppermint essential oil in a glass of water and drink up.

Insect Repellent

Put a few drops of lemon essential oil in a spray bottle filled with water and spray onto the skin  as an insect repellent. However, do not use this repellent method in the sun. Lemon oil can do damage to the skin if the treated skin is exposed to the sun. Avoid sun exposure for 12 hours after applying lemon essential oil to the skin. This method is best used at night or on cloudy and  cool days.

Heartburn

Add a couple drops of lemon essential oil to a glass of water. Drink the full glass. This is said to  relieve heartburn symptoms by neutralizing the acid.

Cough, Sore Throat, and Fever

Adding a couple drops of lemon essential oil to your glass of water can help soothe a sore  throat, calm a cough, and quell a fever. Lemon oil fights against bacteria, as well as viruses.  There aren't many substances around that can do both. Many will do one or the other.

Hair, Skin, and Nails

Lemon oil can be used to fight against oily skin and hair. It also has cleansing properties and is  often an ingredient in homemade hair products. One thing to keep in mind with using lemon in  the hair is that if you go into the sun, the lemon oil might react in such a way that it lightens your  hair up a bit. In my experience, this can make for some good highlights, if applied in the right  manner. Lemon oil is also great nourishment for the nails and can help fight against nail fungus.

Anxiety

Lemon essential oils are often used in aromatherapy, specifically for anxiety and depression.

Memory & Thought Clarity

Lemon essential oil, when used in combination with rosemary may  help increase memory, increase concentration, and provide more clarity of thought. To create  this helpful blend, use 3 drops of rosemary, 3 drops of lemon oil, and diffuse it.

* The author is not a medical professional. Before using any treatments, natural or not, a  licensed medical professional should be consulted.
0 Comments

Essential DIY Home Maintenance for the Fall Season

11/1/2015

0 Comments

 
by Lyn Lomasi, Write W.A.V.E. Media Staff
Picture
Image © Sharon Mollerus; Flickr.com
When the fall season hits, it is time to start preparing your home for the winter and checking for simple repairs that you can do yourself. Doing this will help maintain your home for the coming months, making it a more comfortable and safe environment for you and your family. Here are 10 easy DIY repairs you should do on your home in the fall.

Leaking Kitchen Sinks

If the pipes under your sink are leaking, simply purchase a new PVC p trap and a roll of teflon tape. Removing the old one is as simple as unscrewing the fastened areas and just pulling it off. When installing the new one, place teflon tape at all the joints and screw together the joints. To get the tightest fit, use a plumbing wrench to finish off the screwing. Test your job by running the water for a few minutes. If any water leaks out, either you did not use enough teflon tape or you did not screw the parts together tight enough.

If your sink is leaking around the faucet area, rather than the pipes, you can solve this by replacing the faucet. Simply purchase a new faucet. The instructions for installing your faucet will come in the package. Each can be slightly different. You may also need caulking materials or teflon tape. Check the instructions that come with your faucet.

Bathroom Leaks

Much like in the kitchen, leaks need to also be addressed in the bathroom. Repairing a leak in a bathroom sin is fairly similar to replacing one in a kitchen. Toilets can also leak. Usually it is due to the ball valve kit located under the back cover. These are about 10 bucks each at a home improvement store. All you need is the kit. It is easy to install and comes with instructions.

Dishwasher

To clean the dishwasher, first start by pulling out all the racks and attachments. Now check all the drains and soap containers for debris. Pull any of that out. Sometimes little pieces of food or glass can get stuck in those, so watch for the glass. Once that is done, check all the rubber sealing and be sure it is all secured properly. If not, adhesive rubber strips can be purchased at home improvement stores. Application is as simple as sticking the strips in the proper spot. The adhesive on these can be strong, so be sure you have it in the proper place before pressing it to the surface.

Part of maintenance also includes cleaning. For this, you'll need vinegar, concentrated lemon juice, baking soda, and a sponge or dishcloth. Sprinkle baking soda along the bottom of the dishwasher. Fill a spray bottle halfway with vinegar, 2 tablespoons of lemon juice, and the rest with water. Spray down the inside of the dishwasher, including the bottom, where the baking soda is. The baking soda will bubble. This is fine. That pulls up dirt and grease. Now starting at the bottom, scrub the entire inside of the dishwasher, including the door. Do not rinse away the solution. Replace the racks and fill all soap and other liquid dispensers with the lemon juice and vinegar mixture. Close them and run a normal cycle with a hot rinse and heated drying cycle.

Weather Stripping

Check the weather stripping on the interior, as well as the exterior of your home. Replace any worn or peeling areas. Damaged or improperly placed weather stripping can cause cool air to come inside the home, as well as let heat escape. Weather stripping can be purchased at hardware and home improvement stores. There is stripping with adhesive or that which has to be nailed down. Apply according to which type you choose. Be sure the stripping is applied securely to the surface so that it does its job effectively.

Sealing Cracks

Check interior and exterior doors and windows for cracks. Use caulking to seal any detected problem areas. To caulk a crack around a door or window, simply squeeze a line of caulking along the exposed area and swipe it with a caulking sponge to press the sealant in further, as well as to create a smooth finish. Don't forget to also purchase a caulking gun when you buy the caulk. Without one, the caulking is not as easy to apply. A caulking gun can be as low as a few dollars.

Exterior Basement Drains

Some homes can have exterior drains leading to the basement. Be sure to clear away any brush, leaves, dirt, or other debris from the drain openings. Vinegar is a great natural substance that cuts through tough-to-remove dirt and other substances. Simply spray it on from a water bottle, let it sit for a moments, clear away the debris, and wipe the surface clean with a cloth. As for the inside of the drain, run a plumbing snake or auger through the drain. If it is a short drain, a wire coat hanger can sometimes be substituted for the snake or auger if you don't have access to either. Just pull the coat hanger in and out of the drain.

Shut Off Outside Water

The fall season is a great time to shut off the access to any outside water. Doing so can prevent the freezing of the outdoor pipes around hoses and other outdoor water valves. Also, when you do this, unfasten any hoses or other devices attached to outside water valves. These should be stored away until spring.

Carbon Monoxide & Smoke Detectors

This is a good step for more than just the fall season, but be sure you check to see that all of your detection devices are working properly. Most some detectors and carbon monoxide detectors have a test button. Press that button on each to see if they work properly. With increased usage of space heaters, fireplaces, and other heating devices during the fall season, it is important that your family will have working alert devices, should a fire or natural gas problem occur.

Gutters

During the fall, leaves, pine-cones, and other falling debris can get clogged in your gutters. Clogged gutters can lead to poor drainage. To clean out your gutters, simply scoop out the debris that has collected. A garden trowel works well for this. Once that is done, spray the gutters out with a garden hose or pressure washer. If you are using a garden hose, attaching a high pressure spray nozzle will make this easier. If any of the tubular gutters are clogged, use a plumbing snake or auger to unclog them.

Thermostat & Heaters

It is important to be sure your thermostat and heaters are working before he weather starts to get cooler. First, test them by simply turning them on and being sure that the heat is coming out at the right temperature. If there is no heat coming from portable heaters, they should be replaced. If there is no heat coming from the furnace, you will need to test the thermostat.

To do this, first turn off your furnace. Then, return to your thermostat box and remove the cover. Remove the wires from the panel by unscrewing them from it. Take the red and white wire and wrap them together. Tape the wires you won't use to something, such as the wall, while you are working. You don't want to lose them inside the wall. Turn the the furnace back on. If the furnace blows and its burner ignites, then your thermostat is bad. If this doesn't happen, you may actually have a problem with the wires, not the thermostat. Check to make sure the wires run all the way to the furnace.


*Also found on Better Plumbing © Lyn Lomasi; Write W.A.V.E. Media
0 Comments

Beneficial Garden Fungi: Using Natural Fertilizers, Weed Killers & More Made from Fungus

11/1/2015

0 Comments

 
© Lyn Lomasi; Owner/Shaman/Master Creator at  Intent-sive N8R & Brand Shamans Content Community LLC
Picture
Image © J Brew; Flickr.com -- The Corallorhiza Maculata lacks chlorophyll & obtains all its food from a specific fungi
When you hear the word "fungi", you may automatically think of something negative. There are many harmful types of fungi, so assumptions are often made that fungi is always going to be a bad thing. Fortunately, that isn't always the case, especially when it comes to gardening. Here are some ways to use fungi that are actually beneficial for your garden.

Mycorrhizal Fungi, also known as mycorrizhae, is extremely beneficial to the plants in your garden. In an undisturbed growing environment, such as a deep forest, mycorrhizae is naturally present. However, in residential areas or areas in which the land has been disturbed by human life, it is not as prevalent. Mycorrhizae help the plants thrive by providing an environment in which the plants can access the nutrients from the soil.

Micorrhizae are actually natural soil fertilizers. Using natural fertilizers can provide your garden with the mychorrizal fungi that is needed. Some minerals and nutrients can only be accessed this way. Root Shield is one type of natural beneficial fungus fertilizer. To use it, just mix it with the recommended amount of water according to the size of your garden and sprinkle the entire garden with a watering can.

Some ant species use certain fungi to their benefit to gain access to important nutrients they otherwise would not be able to get. They create little miniature "gardens" of this fungi. The fungi then soaks up this nutrient and the ants feed on the fungi. It is a good idea to keep ants in your garden, rather than get rid of them with harmful chemical pesticides.

Not only are the chemical pesticides bad for you, as well as your garden and the Earth, but many ants are good for your garden. They protect plants and even kill off the insects that do harm to plants. The ants actually do all of this themselves naturally, so there isn't necessarily anything for you to do but make sure you aren't killing off the ants and be sure you have the type of ants that do this. Different ant species can be ordered live through ant farms.

Speaking of pesticides, some pesticides can be beneficial to your garden, such as natural pesticides. Some natural pesticides are made from beneficial fungi. These are generally sold as a mixture to be added to your regular fertilizer treatment, unless your fertilizer already contains mychorrizhal compounds. Follow the directions of your specific beneficial fungi pesticide when applying it to your garden.

Another use for beneficial fungi in your garden is as a natural weed killer. Beneficial fungi can kill off harmful weeds so that the plants that should be thriving will have the space they need to grow. Weeds can also suck away all the nutrients, leaving the other plants starving.

The beneficial fungi contained in natural microbial fertilizers containing mychorrizhal compounds, such as mentioned above, also serve as an agent against harmful weeds. Beneficial fungi can be used to kill off harmful fungi in your garden as well. The application of the fertilizer, such as RootShield, containing mychorrizhal compounds should be helpful in keeping harmful fungi away.

0 Comments

Moving with Kids: Lessons from Sorting & Packing

10/31/2015

0 Comments


Did You Know You Can Teach Your Kids While Preparing to Move?

by Lyn Lomasi, Write W.A.V.E. Media Staff
Picture
Image © Lyn Lomasi; All Rights Reserved
Moving with kids can be a real chore, both physically and mentally. But did you know you can also use it to teach them lessons? Many aspects of moving are educational, as I've learned by moving with my kids several times over the years. Just sorting and packing offers many learning opportunities.

Packing to move teaches organizational skills. What better way for kids to learn organization than by actually doing it? Kids will learn how to organize in several different ways with packing. They can learn to reduce clutter by getting rid of unnecessary items. They'll also learn how to put away items both neatly and gently, depending on what's in the box, how breakable it is, what room it goes in, and more.

Teach kids to give by donating unwanted and unneeded items. There will likely be many items you do not wish to move into your new home. But don't just throw it all away. There are many people who can use even the simplest of items. Have the kids help in sorting and donating these items to the less fortunate. This teaches them compassion, as well as green living skills. Reducing and reusing is always better for the environment than needless waste.

Capacity lessons come from packing, weighing, and measuring. Have the kids weigh, measure, and pack items to learn about capacity. How much weight can fit into each box. If certain items weigh a particular amount, how many of them will fit in the box, based on both weight and size. These are all great hands-on lessons to accent what the kids know or will learn in future math lessons.

Sorting and packing items helps teach value to kids. By determining which items to pack, which to give away, and which are non-salvageable, kids learn value in more than one way. They learn what things mean the most to themselves and to others. They also learn that when you mistreat things, no one can use them.

Fun memories can arise and be created through sorting and packing. The action of packing and sorting may trigger memories related to the items or to past moves. It creates great conversation fodder and it can also be nice to reflect on those things together. Kids also are likely to enjoy the action of sorting and packing and dream of what it will be like in the new place. This in itself creates some great memories. Plus, it's just fun! What kid doesn't like playing with boxes?
0 Comments

Summer Fun: Create a Beach in Your Backyard

6/7/2015

 
by April Paul, Brand Shamans & Write W.A.V.E. Media
P3090661
Summertime is the time of year when everyone wants to go swimming. Not everyone has access to a beach and not everyone who does have beach access feels like going to the beach for whatever reason. Maybe it's too crowded, there's no beach, or you don't want everyone seeing you in your swimwear. No matter your reasons, here's a fun solution. Create a  beach in your own backyard.

Materials Needed
  • 1 large sandbox or boxed-off area in your backyard
  • beach sand (enough to fill the box or area plus some extra)
  • 1 pool or baby pool (size-appropriate for everyone)
  • sand toys
  • beach towel for each person
  • cooler with drinks and lunches
  • sunglasses for each person
  • sunscreen or sunblock lotion

Creating Your Backyard Beach

Step1: Forming Your Backyard Beach Shore

To make your beach shore, you will need to fill your sandbox or boxed-off area with beach sand. Beach sand can be bought at retail stores that sell gardening supplies. It is also sold at many home improvement warehouses, such as Home Depot.

If your city has neither of these, you may want to ask someone at a local hardware or garden store. It can also be purchased from gravel and rock manufacturers as well as from playground manufacturers. Beach sand is readily accessible.

Keep in mind that in order to create the full effect, you are going to need a large amount. You will want to fill a space that when full, the whole family can spread out onto comfortably. When filling your area, make sure to get the beach sand as high up as possible.

You want your surface to rise at least 2 feet from the ground. If you cannot find something that is this high, you can purchase a second baby pool that is 2 feet high and fill it with the sand. Save enough beach sand to line the entire bottom of the water pool 2 inches high. Line the pool bottom with sand before filling it with water.

Step 2: Creating Your Backyard Ocean

The pool will serve as your ocean. It should be placed directly in front of your shore. It is helpful to get a square or rectangle-shaped pool, but not necessary. The square or rectangle-shaped pool will align better with the shore and create the best mock beach. The sides of your pool should be 2 feet high to match the height of the shore.

Most standard baby and family pools are 2 feet high. After aligning your "ocean" as best as possible to the "shore", you will need to fill the bottom 2 inches full of sand. Pack it tight. You may need to add a small amount of water to make it firm. Once that is done, fill the pool with water to the desired fill line. If any sand is clouding the water, let it settle before swimming.

Step 3: Setting Up For the Day At Your Backyard Beach

A day at the beach usually consists of playing in the sand, sun bathing, swimming, and eating packaged lunches. For the full effect, pack your cooler with everything you'll need and put it in the sand. Lay out all your beach toys in the sand. Do not forget anything in the house.

Do not use the house for anything but a restroom. Lay out your towels on the sand as you would at the beach. Spend the day playing in the sand, lounging in the sand, swimming, and doing what you would normally do at the beach.

Maintaining Your Backyard Beach

If you enjoyed using your backyard beach, you will want to utilize it more often. If you bought a pool and sandbox with a cover, this will be easy. If not, there is still hope.

The first step in maintenance is to get a toy sand sifter or kitchen strainer and sift out all the grass and other large residue. Once this is done, put a small amount of chlorine in your pool to disinfect the germs. If your family cannot tolerate chlorine, vinegar is an alternative. It will likely take an entire gallon of vinegar. Pour it in the pool and let it sit for at least a few hours before swimming in it again.

Repeat this after each day of swimming. Cover the pool and sandbox after cleaning and adding the disinfectants mentioned above. If you don't have covers, tarps also work well because you can cover the areas. Then with sticks or stakes, you can secure the corners to the ground. This will keep out leaves and other debris.

The water will likely need to be refilled at times because as people play in it, some will naturally get lost. Evaporation also takes some water. Remember that whenever you have to refill your water, you will also need to add more vinegar or chlorine. Always check the labels on the chlorine for proper amounts. For the vinegar, if you can smell it very strongly, you have used too much.

The sandbox in your backyard beach may need to be sifted through for debris to keep it clean. Always keep it covered when it is not in use. This will keep neighborhood animals, as well as your own, from using it as a restroom or digging it up.

*Note that this content is for informational purposes only. Please check with your health provider and use your own discretion when it comes to health, safety, and sanitary practices.

How to Plant Grass Seed (A Step-by-Step Guide)

1/30/2015

0 Comments

 
by Lyn Lomasi; Owner of Intent-sive Nature & Brand Shamans Content Community
Grass
Oh no! It will soon be time for summer fun in the yard. Excited to begin but your lawn isn't? Whether you have missing patches of grass to fill or need to seed an entire lawn, this easy step-by-step guide will help you learn how to plant grass seed.

Before planting grass seed, keep in mind the best temperatures and seasons for planting. A temperature of above 70F is optimal. Anything below (especially freezing temperatures), will create a longer wait time for the seedlings to start sprouting. Late spring and early summer are the best planting seasons for starting new grass seed.

Loosen Soil

The first step in planting grass seed is to loosen the soil. For smaller areas, a regular garden hoe will do the trick. For larger areas, you may want to use a till. Your goal is to bring up the second layer of soil to the surface.

Prepare Soil

Prepping the soil comes in a few steps. First rake the soil to clear it of any leaves or other unwanted items. Next, mix some topsoil in with the original soil from the ground. Spread that mixed soil over the area where the grass seed will be planted.

Fertilize Soil

The next step is to fertilize the soil. This can be done with the use of a handheld spreader for small areas. For larger areas, use a traditional spreader. Spreaders can be purchased at a fairly decent price at home improvement stores and warehouses, such as Home Depot.

Spread Seeds

Now that the soil is ready, it is time to spread the seeds throughout the planting area. For smaller areas, this can be done by hand. Just as with the fertilizer, a spreader can be used if necessary.

Water Seeds

Now that the seeds have been spread, it is time to water them. Be sure that the seeds get plenty of water. Soil should be moist and the water should run deep into the soil. Watering daily will help the seeds germinate properly. It may take up to three weeks for the planted seeds to grow into grass. Once it has grown to almost 3 inches, it is safe to mow, but never mow off more than 1/3 of the original height.

0 Comments

5 Must-Have Items for Organizing a Kid's Bedroom

1/2/2015

0 Comments

 
by Lyn Lomasi, Write W.A.V.E. Media Staff
Homeschool Materials on Bookshelf
"I can't find my shoe!" "I want my red skirt!" Organizing a kid's bedroom with him in mind helps prevent these and similar scenarios. Offer space-saving solutions that are also convenient to your child for the best results. Being a mom to many has taught me many things about storage and organization. Here are some of my top must-have items for organizing a kids bedroom.

Canvas bins offer many solutions. These come in many sizes and can be used all over the room. Slide a flat canvas bin under the bed for storing shoes and extra blankets. Choose canvas bins of all sizes to organize toys and other items on a shelf. Have a certain bin designated to library books or toys that travel in the car or to Grandma's house. The possibilities are endless when it comes to canvas bins and kids.

Hanging rod organizers help kids keep track of items. Need an easy way to be sure your kids always know where there shoes and matching outfits are? Try closet organizers that hang from the clothing rod. Some have compartments and some keep clothing condensed. You can find shoe racks, sweater racks, and even special hangers that help kids keep their items neat and easily accessible.

Hanging storage solutions create more floor space. Need a way to get all those stuffed animals or other collections off the floor? Try hanging the stuffed animals in a fun design or finding a ceiling storage rack for them. These are generally very cost-effective and can be found in varied shapes, sizes, and materials. It also keeps the items in the child's room, while keeping them out of the way at the same time.

Wall storage helps organize smaller items. Too many items strewn across the dressers and shelves? Try wall organizers. These could be made of wood, canvas, or metal, depending on your child's décor and their intended purpose. You can even make your own if you're feeling inventive. Use up all that wall space, instead of letting it go to waste. You'd be surprised at how much more space your child will have.

Drawer dividers help kids keep clothing neat. Tired of going to grab something from your child's drawer and seeing everything disorganized. Try drawer dividers. By sticking these in between certain items, it helps your child see that everything has its place. This must-have bedroom organizational item is especially handy for younger kids.

0 Comments

DIY Basketball Bedroom Decor Ideas for Kids

1/2/2015

0 Comments

 
By Lyn Lomasi, Write W.A.V.E. Media Staff
Picture
"Swish!" Was that Kobe? Not this time. That's the sound of your son or daughter making a shot from the bed. You've got the over-the-door setup covered. But she wants more items to show off her favorite sport. You can create a fun basketball themed bedroom for your child without going too commercial or spending too much cash. Go homemade with this simple DIY basketball bedroom décor for kids.

Easy No-Sew Basketball Throw Pillows

To make some simple basketball throw pillows, you'll need orange fleece, black piping, fabric glue, and filler material. How much material you need will depend on how big or small you want the pillows and how many you will be making. Basically, look at the fabric and imagine cutting out two circles per pillow that are slightly wider than your desired size.

Take those two circles and glue them together just around the edges outside in. Leave a small opening to put the filler into. Once the glue is dry, turn the material inside out. Fill it with the material to the desire fullness. Now fold the open edges down and glue them together to line up with the already-glued edges. Once that's dry, take your piping and cut in appropriate lengths to glue basketball stripes on the outside of the pillow. Let those dry and you're done.

Hanging Basketball Lanterns

For these, simply purchase the desired number of round paper lanterns in orange. You'll also need some heat-safe black paint. Hobby paint used for model cars works great for this type of project because it can be purchased in very small amounts or large containers. This way you only need to buy what you need. Take a paintbrush and paint the stripes onto the lanterns to make them look like a basketball.

Basketball Scoreboard

To create a basketball scoreboard, you'll need a chalkboard in the desired size, some chalk, white acrylic paint, and a paintbrush. Paint the scoreboard template onto the chalkboard and let it dry. Now whenever the kids shoot hoops on the over-the-door net or with paper balls into the trash can, they can use the chalk to keep score.

Basketball Wall Décor

For wall décor, collect any odds and ends related to basketball and frame them. This could be tickets, hats, jerseys, deflated basketballs, and more. Frame each item separately and hang them all around the room. Make it like your child's personal hall of fame if he or she plays the sport. If not, just make it about the game, in general.

Basketball Bed Post Décor

Want to create a basketball bed for your child that doesn't cost you a fortune? You can use your child's bed posts and four basketballs to create this look. In addition to four basketballs, you'll need an air pump and some household glue, such as Goop or E-6000. Deflate each ball about ¼ of the way. Place them over the bed posts. If they don't fit quite right, inflate or deflate until the size is right. Now take some of the household glue and secure the basketballs to the post. Be sure to leave the side with the air hole accessible in case air needs to be replaced at a later date. Allow the balls to dry on the posts 24 hours before disturbing them.

0 Comments

Choosing Versatile Furniture for a Kid's Bedroom

12/28/2014

0 Comments

 
by Lyn Lomasi, Write W.A.V.E. Media Staff
Tradewins Doll House Wood Loft Bunk Bed: Furniture & Decor by musyarofah liked from a luxurious wicker sofa.
"But mom, I need a couch, a desk, a bed, and a dresser all to fit into my room. Oh, and I also need a card table and a vanity." If this statement worries you, think about choosing versatile furniture for a kid's bedroom.

Choose flexible colors and patterns. Ever seen a child's room where the colors and patterns just don't mesh? Many times this is due to lack of planning. The parents may have picked out one pattern when the child was younger and blended several over the years. Choosing solid colors and neutral patterns can help prevent this. Does your child like a particular character or item? Choose furniture of those colors and keep the character or object pattern to the bedding and draperies. Those are easier and less expensive to switch out as your child grows. Solid colors make furniture more versatile, as it can be used for years to come as the child's tastes grow with him.

Use transitional furniture. Another way to keep kids furniture versatile is by choosing pieces that can transform into stages as your child grows. For instance, choosing a convertible crib that changes from a crib, to a toddler bed, then a twin sized bed is a wiser purchase than a simple crib. Choose furniture that easily changes when your child's needs do.

Choose multipurpose items. Rather than choosing items that have only one function, save space by choosing things that are good for more than one purpose. For instance, you might choose a bench that also doubles as a storage space. Another option is a futon or other seating area that also doubles as a bed. This helps save space in your child's room. But at the same time, it gives them all the items they would like to have.

Choose items with multiple age levels. Rather than buying small items that will not grow with your child, choose those that are appropriate for all ages. For instance, one table and chair set may accommodate only preschoolers. Yet another may work for preschool age on up to teens. The second option is more versatile. It will last longer and also will come in handy when friends of relatives of varying ages come over for a play date.

What are the benefits of choosing versatile furniture for a kids bedroom? Items that work for many uses and a variety of age levels are beneficial in many ways. These items, though sometimes pricey, can actually be a savings in the long run. This is because they will help prevent the purchase of other items in the future. These items often grow with the child, which means they don't have to give up their favorite items. Another great benefit to versatile items is that if your child decides he does not like a piece as he grows, it can be re-purposed for another family member or friend.

0 Comments

Cost-Effective Curb Appeal: Landscaping to Raise the Resale Value of Your Home

11/27/2014

0 Comments

 
by Lyn Lomasi, Write W.A.V.E. Media Staff
Window boxes in November, Charleston, SC
Looking to sell your home and maximize your profits? First, you need to raise the resale value, especially with cost-effective curb appeal. There are many ways to do so. Landscaping is said to have a 100 to 200 percent value of recovery at a sale. Other popular methods to raise resale value, such as kitchen and bath remodels, have smaller recovery rates. Some might argue that beautiful landscaping is costly, especially when going for curb appeal. Fortunately, there are  cost-effective ways to get that desired curb appeal.

Patching up the Lawn

Maintaining a nice lawn for curb appeal is often thought to be expensive, but there are ways  around that. For instance, when you've got dry patches, instead of spending a ton of time and money on products to re-grow that patch, consider purchasing a square of grass from your local  garden center or home improvement warehouse. This way, the grass already looks nice and all  you have to do at that point is insert it into your lawn and maintain it like the other areas. Grass  squares are generally inexpensive. A nice, green lawn is great curb appeal.

Blooming Flowers

Colorful flowers that go with the season add curb appeal by brightening up or drawing attention to the outside of a house. These flowers can be displayed in pots, a flower bed or a combination  of both. Annuals often are very cost-effective, averaging under a couple dollars for six or more. These can be found at local garden centers, home improvement warehouses and big name  retailers.

Window Boxes

Falling in line with the cost-effective flower idea, window boxes add great curb appeal. They are  fairly inexpensive to make or buy, and planting colorful annuals inside them can be beautiful.  This makes for a very simple and cost-effective curb appeal project.

Potted Plants

Potted plants are a great way to add cost-effective curb appeal to your landscaping or walkway.  When dispersed around the landscaping and other areas, potted plants can make the outside  of a home very appealing and inviting. Plain clay pots are generally the most cost-effective. To  spruce them up, they can be painted with inexpensive outdoor spray paint or ceramic paint. Designs or plain colors can both work well, depending on your desired look.

Pedestals

A few strategically placed pedestals can also add cost-effective curb appeal to the landscaping of your home. These can be placed in the lawn, along the walkway or even at the front door. To  add even more curb appeal, place a potted plant atop each pedestal.
0 Comments

Easy Ways to Add Curb Appeal to Your Front Stairs and Landing 

11/16/2014

0 Comments


Adding Curb Appeal is Fairly Simple

by Lyn Lomasi, Write W.A.V.E. Media Staff
Untitled
Adding curb appeal to your home doesn't have to be hard. It can actually be quite fun. Whether you're dressing it up for a showing, just want your home to look the way it makes you feel, or just want to show off to your friends and neighbors, there are many things you can do to add curb appeal to your front steps and landing.

Why Should I Worry About Curb Appeal?

Curb appeal is important to a home for a variety of reasons. Your home should feel inviting to you. It should also be something you are proud of and should show your personality. Adding curb appeal could help you feel that before you even step foot in your door.

If you are selling your home, curb appeal can help make sale. If a home is not attractive on the outside, buyers instantly get a bad impression before stepping foot in the door and may expect (and look for) the worst. Another reason for curb appeal is that you don't want your home to stand out as the eyesore of the neighborhood.


Using Potted Trees Appropriately

One simple way to add some curb appeal to your front steps and landing areas is to use potted trees. Potted trees can make attractive scenery and there are many styles to choose from. Try to choose trees that will do well in your climate, as well as accent the area. For instance, you don't want to put a tall palm tree in the middle of a small walkway in the dead of winter.

Walkway Gardens For More Style

Gardens can be created just about anywhere. A walkway garden is another way to create curb appeal. This can be done right into the ground. However, if there is already cement or stone in place that you'd rather not dig up, you may want to take another approach by using potted plants and other scenery along the border of the walkway.

A raised bed garden also works great as a walkway garden. The container for one of these can be created with wood, stone, brick, or other materials. You can purchase these and other necessary materials, as well as the plants at the local home improvement center. Flowers and shrubbery both work well for raised bed gardens that will be along a walkway.

The garden can be centered or created along the sides of the walkway, leading up to the landing. Placement should depend upon your individual taste, as well as your exterior layout and available space.


Accenting Your Landing


Decorative planters are another great way to accent your stairs and landing. They come in many sizes and a variety of plant choices can be used to match your scenery and effectively draw positive attention to your home. Garden centers and home improvement warehouses generally have a big selection of planters, as well as plants and flowers.

Choosing containers with nontraditional shapes and placing them along the stairs is one way to add curb appeal with decorative planters. Another way could be to plant some flowers in a fountain or other non-traditional item that can be used as a planter.


Decorative pedestals can also create curb appeal. Placing them at the landing of the stairs can create an elegant look, depending upon the layout of your home. Try painting the pedestals with textured or marbleized paints. Go for colors that blend in with the look of your home, as well as the outdoor scenery.


Making a Splash With Water Features

Another great way to add curb appeal is by using water features. Above, there was an example of using a fountain as a planter. That's one idea. Another could be to create a tropical or forest scene inside a water feature.

Water is calming and soothing and can make you and your guests feel welcome before even setting foot inside. Set up this water feature on your landing, being sure to still leave room for accessing the stairs and the home. If your landing is small, water features can be created on walls as well.


There are many ways to add curb appeal. It's all about adding accents to your existing features. Everyone has their own individual taste and style. No matter which options you choose, be sure it not only makes your home look attractive, but makes you feel at home as well. At the end of the day, it is still your home and the main curb appeal should be catered to your own preferences.

0 Comments
<<Previous

    RSS Feed

    Life & Home Journal

    ♛Cre8te & Elev8te by Lyn Lomasi♾️♛

    Sign up for free tips, news, deals, & more!

    BONUS: FREE guide "5 Must-Know Content Hacks to Attract More Customers (Fast!) " just for signing up. 

    Thank you!

    You have successfully joined our subscriber list. Your FREE guide email will be delivered soon!

    Let's cre8te & elev8te!

    Shop
    Shop
    Shop
    Shop
    Shop
    Shop
    Shop
    Shop
    Shop
    Picture
    Lyn Lomasi
    Owner/Master Creator
    Contact Us
    Picture
    Stephanie Laursen-Nolan
    Master FReelance Creator
    Contact Us
    Picture
    Crystal S. Amon
    Guest Freelance  Writer
    Contact Us

    Archives

    January 2024
    December 2023
    November 2023
    September 2023
    August 2023
    July 2023
    May 2023
    September 2022
    March 2020
    January 2019
    November 2018
    October 2018
    September 2018
    August 2018
    July 2018
    June 2018
    May 2018
    April 2018
    March 2018
    February 2018
    January 2018
    March 2017
    November 2016
    September 2016
    July 2016
    March 2016
    November 2015
    October 2015
    June 2015
    February 2015
    January 2015
    December 2014
    November 2014
    October 2014
    September 2014
    August 2014
    July 2014
    December 2012
    November 2012
    July 2012
    April 2011

    Categories

    All
    Air Freshener
    Alicia Bodine
    Allergies
    Alternative Medicine
    Altmed
    Aluminum
    Apartment Living
    Apartments
    Aphids
    Aromatherapy
    Asthma
    Auto
    Auto Insurance
    Autumn
    Backyard
    Backyard Activities
    Backyard Games
    Bargain
    Basketball
    Bathroom
    Beach
    Beauty
    BedInABox
    Bedroom
    Beneficial Fungi
    Birthdays
    Blackout
    Blankets
    Bleach
    Bleach Alternative
    Bleach Free
    BroncoBago
    Budgeting
    Building
    Building Materials
    Cell Phone
    Cheap
    Chemical-free
    Children
    Cleaning
    Clowning
    Comfort
    Cooking
    Copper
    Cotton Balls
    Cottonballs
    Couponing
    Cozy
    Credit
    Curb Appeal
    Debt Management
    Decor
    Decorating
    Depression
    Design
    Dining
    Disaster
    Disinfectant
    DIY
    Dollar Tree
    Eco Friendly
    Economy
    Emergency Preparedness
    Employment
    Entertaining
    Essential Oils
    Ethnic Hair
    Exterior Decorating
    Fall
    Family
    Feng Shui
    Fertilizer
    Finances
    Fitness
    Floral
    Flowers
    Food Preparation
    Fungi
    Fun With Kids
    Furniture
    Garden
    Gardening
    Garden Parties
    Germs
    Gifts
    Grass
    Green
    Gutters
    Hacks
    Hair
    Hair Color
    Hair Growth
    Halloween
    Handy
    Handy Hints
    Home
    Home Decor
    Home Improvement
    Home Living
    Homemade
    Homeowners Insurance
    Home Resale
    Home Sales
    Home Spa
    Household Hints
    Household Tasks
    Housing
    Hydrogen Peroxide
    Insect Control
    Insect Repellents
    Insurance
    Intentsive Nature
    Interior Decorating
    January
    Job Hunting
    Kids
    Kitchen
    Landscaping
    Laundry
    Life
    Lizzie Weakley
    Lyn Lomasi
    Magic
    Makeup
    Mattresses
    Medicine
    Money
    Moving
    Moving Preparation
    Natural
    Natural Pesticide
    No Bleach
    No Chemicals
    Organization
    Outdoor Kitchen
    Outdoors
    Packing
    Parenting
    Party
    Performers
    Peroxide
    Personal Finance
    Pesticide
    Phone
    Pillows
    Planting
    Plombier 92
    Plumbers
    Plumbing
    Preparing To Move
    PVC
    Real-estate
    Rentals
    Repellent
    Retirement
    RV Life
    SAD
    Sanctuary
    Saving Money
    Seasonal
    Seeding
    Self Care
    Shopping
    Sink
    Skincare
    Sleep
    Spiritual
    Stacey Carroll
    Stain Removal
    Steel
    Summer
    Sunday
    Survival
    Table
    Table Settings
    Tara Bard
    Thrift
    Throw Pillows
    Tweens
    Vacations
    Versatility
    Vinegar
    Weddings
    Winter
    Wood
    Work Life
    Work Life Balance
    Ziploc

    Save up to 40% off
MAKE MONEY FROM HOME AS A BRAND SHAMANS AFFILIATE! | Earn 50% Commission Per Sale With The Brand Shamans Affiliate Program!

*Disclaimer:
Any information provided about crystals, spiritual practices, and healing is intended for educational and informational purposes only and has not been evaluated by the FDA. Individual results may vary. Please practice caution and informed decision-making in your personal journey. The author is a trained Shamanic Alchemist and experienced holistic researcher. Our content, products, or services are not a substitute for professional medical advice, diagnosis, or treatment. Always consult with a qualified healthcare professional before beginning or changing any medical treatments or health-related practices.


If you are looking to advertise your talent, purchase an appropriate Content & Brand Elevation package or use the Contact Form to inquire about other placement opportunities.
Certain types of paid advertising are available if we align.


♛Cre8te & Elev8te by Lyn Lomasi♾️♛

Sign up for free tips, news, deals, & more!

BONUS: FREE guide "5 Must-Know Content Hacks to Attract More Customers (Fast!) " just for signing up. 

Thank you!

You have successfully joined our subscriber list. Your FREE guide email will be delivered soon!

Let's cre8te & elev8te!


Recently Published Around Our Community

COMPANY & SUPPORT

About Us & Contact
Brand Healing Journal
Brand Ambassadors Program
Affiliate Program
Disclosure, TOU, Disclaimer, & Privacy Policy
Freelance Writing Gigs

BBB Listing

ALL SITES

Brand Shamans
FLOW-Key Parenting
Lyn Lomasi
Article Writer For Hire
Pre-K Yoga
Heart 'N Mind Homeschool 
Pawsitive Parenting
Gawwwdess
Brand Shamans Affiliates
Herbal Intent

Blogging Abundance
Nathan Raps (Partner)

Realm Traveler (Partner)
Princess Crystal Says (Partner)

Authors Large And Small (Partner)
Alliance Tech Repair (Partner)

© 2005-2025 Brand Shamans Content & Creators Community LLC
Picture
Photos from brian.gratwicke, Mick E. Talbot, kelly.sikkema, pockethifi