|
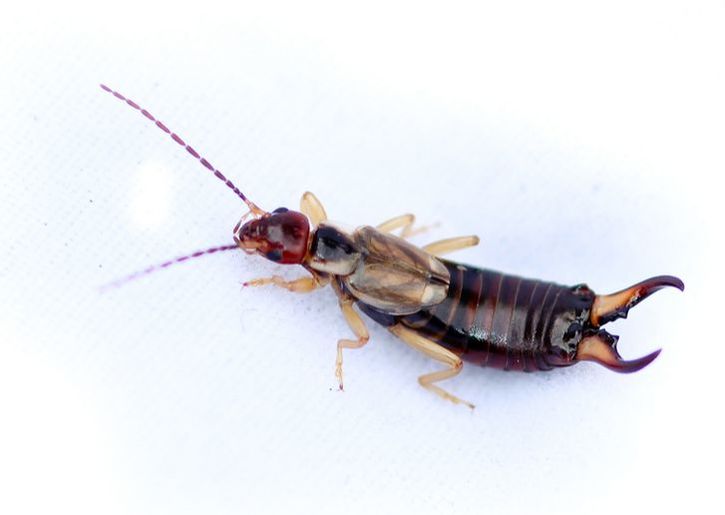
There's nothing worse than seeing an earwig, pincher and all, in your home or garden. OK, so maybe there are worse things. But it's downright creepy and frustrating. Plus, if you're like me, chemical repellents are out of the question. Luckily, there are a few natural earwig repellents. Since earwigs do not make nests inside homes, they can be eliminated from the home fairly quickly. It may take a little more consistency in the garden, but they can be repelled from there as well. Get out your cooking oil. No, you aren't going to fry the earwigs for dinner. Fill a small square container to the halfway mark with vegetable oil. Place it where you have noticed the earwigs most. Each morning, you can scoop out and discard any earwigs with a spoon and reuse the oil. The earwigs are attracted to the oil and to the shape of the container. But once they climb in, they get stuck in the oil and can't get back out. This natural earwig repellent can be used both indoors and out. Wow, a use for that newspaper has arrived. In the age of the internet, many people are neglecting their newspaper. Now you can use it as a natural earwig repellent. This method works best for controlling earwigs inside the home. Take a couple pages of newspaper and roll them up loosely into a rod shape. Now spray the newspaper roll with a light mist of water -- enough to make it damp. Place the dampened newspaper roll in the area where you are seeing earwigs. Leave it there for several hours or overnight. Once it has attracted some earwigs, discard the newspaper into a sealed trash bag and take it out immediately. Repeat as necessary. Get some diatomaceous earth. This substance can usually be found at local garden centers and plant nurseries. Sprinkle it in areas where the earwigs are found, either indoors or out. This substance will kill the earwigs by drying them out. It depletes their exoskeleton of the essential moisture, causing them to get dehydrated. I personally tend to leave this particular method as the last choice to opt for the more humane options first. This natural earwig repellent is highly effective and best used when there are more than a couple earwigs to deal with. Repel earwigs by taking away their comfort zones. Did you know that earwigs like moist areas? Keep the indoors and outdoors dry to discourage them from coming around. You'll of course need to water the lawn and garden. But a good drainage system can prevent excess moisture from building up and attracting the earwigs. Also, try to avoid using wet or organic mulches. Use gravel or stones instead. If your kids like to run in the sprinkler, rotate its position often, so as not to saturate one area of the yard. The plus side to the rotation is that your lawn will get evenly watered while the kids play in the sprinkler. *I originally published this via Yahoo Contributor Network LAST UPDATED 2/24/2022
0 Comments
Is your organization technique missing some steps? Do you even have a plan? If your household tasks are getting out of control, you need to get organized. Even if your to-do list is monumental, you can get it done by organizing your household tasks step by step. My natural multi-tasking tendencies have gotten me into trouble a few times. But with a little organization, it can all be put back together.
Step One: Make a list of every household task. Before you can even get started, you need to have a clear breakdown of every single thing you do. From vacuuming the stairs, to dusting, to dishes, and so much more, don't leave anything off your list. It's important to get everything on there so that you know exactly what you are dealing with. If you leave things off, it pretty much defeats the purpose of making a list for organizing household tasks to begin with. Step Two: Organize the list by timeliness. Make a column each for daily, weekly, and monthly tasks. Go through your tasks one by one and place them in the appropriate column, according to how often they need to be done. Not all aspects of cleaning and other household chores need to be done every day. For instance, paying the bills can be cut to weekly or even monthly, depending. Vacuuming the basement room no one uses should not be taking up time every day. You know which tasks you should and should not do every day, even if you don't exactly follow that right now. Step Three: Eliminate or slow down on unnecessary tasks. You may find there are some things you are doing too often, which takes time away from other tasks. For instance, do you really need to dust the ceiling fan twice a day every day? Really? You could be doing something more productive, like tackling that huge pile of dishes that sat overnight. Prioritizing is a big part of organizing household tasks. Look through your list and find things that you really don't need to be doing or things that can be minimized. Leave deep cleaning to the weekly and monthly task list, so that you can tackle more of your daily tasks efficiently. Step Four: Designate some tasks to another person, if possible. If you have kids and/or a partner or spouse, this will be easier to do. In that case, you should definitely not be the only one completing household tasks and chores. If you don't have anyone else to share tasks with or there are too many, consider hiring someone. Not all families can afford to do this. But if you can, it can reduce some of the time you spend cleaning and organizing. Household tasks can take up a great deal of time, especially if there are more chores than your household members should be expected to do. Step Five: Test it out and adjust as necessary. Once you have completed the other four steps, it's time to try out your new plan in action. If you aren't seeing a difference, then it's time to readjust steps two through four. Keep testing and readjusting until you have a plan that works well. Organizing household tasks is a daunting job. But it's certainly better than running around like crazy and accomplishing what seems like hardly anything. Once you get down a routine that works, stick to it and you'll see a major improvement in your household organization and most likely some extra time to enjoy yourself.
LAST UPDATED 2/24/2022
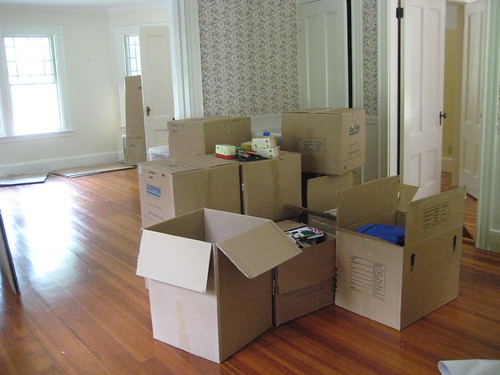
Preparing to move? It can be so draining. But if you keep things organized, it will save you time and energy in the long run. Think weeding is all you should do? Here are some other things you can do to keep things organized during a move.
Do you really need all those clothes? Some people will gasp at this, but there is a such thing as having too many clothes. You know half of them are probably not even your size anymore. Go through your clothing and donate what no longer fits or those items you never wear. If you're holding onto something for just the right moment, you may not ever wear it. Only keep what you actually wear, along with some type of formal attire if you have any. Speaking of formal wear, do you really need fifteen formal gowns? Really? How often do you wear them? If your answer is never or hardly ever, you don't need more than one. It's easy to use one "little black dress" as the base of your outfit and have it look completely different each time. I would even go so far as to say most people don't even need one. They can be rented if you actually have the occasion for one. Most people don't. If it's already there in your closet, you may as well make use of your favorite. Follow the three month rule. Excluding seasonal items, if you haven't used something in three months, give it to someone who will or recycle it. You have no use for it. Yes, I know that rug from the '70s may go back in style at some point. But part of the organization involved with moving is getting rid of things you don't need. You don't need that rug. You also don't need all those stuffed animals you should have gotten rid of as a kid or that cracked mirror that's peeling off your bedroom door. Organize unwanted items by donating or selling what's still useful, recycling what you can that isn't, and trashing what's left. Label everything and keep it neatly in a designated area. This has been a lifesaver as we prepare to move. Each time we pack something, it goes into a particular area of the house. If it's a box or container, it gets labeled. If it's furniture, it gets positioned in a way that it cannot be used. This helps prevent the dreaded unpacking of packed items. We try to keep that area as orderly as possible but with kids running around, it can be difficult. Kids don't like their items packed. They will try to unpack them. Packing them as securely and out of reach as possible helps, if you have little ones. A locked unused room or storage area may help. Tape each box shut once it's packed, to keep out kids AND adults. Again, kids don't like their items packed. So to prevent the kids from unpacking the boxes, it's a good idea to tape them all shut. We do this with all containers, even plastic storage bins. Duct tape is our preferred tape as it deters the kids better than standard packaging tape. It will take them longer to work at it and generally, they'll get caught before they get very far. Since I know you are thinking it, yes, sealing the boxes with tape helps prevent adults from unpacking too. It isn't foolproof, but it does help. When everything is taped up and ready to go, it is more likely to stay organized as you prepare to move.
LAST UPDATED 2/24/2022
|
LIfe & Home Journal
Archives
January 2024
Categories
All
|
- Brand Shamans
- Brand Healing
- Inner Healing
-
INTENT-SIVE NATURE
- Content & Brand Elevation
- Healing Jewelry & Talismans
- Bath, Beauty, & Self-Care
- Healing Sessions
- Rituals, Herbs, & Altar Supplies
- Gawwwdess Baby Boutique
- Soul Flame Gifts
- Yoga & Meditation
- Books & Media
- Education & Homeschool Resources
- Home, RV, & Decor
- Clothing
- Pets
- Custom Orders
- Monthly Subscription Boxes
- October Festivals
- FLOW-Key Parenting
- About & Contact
- RV, Nature, & Travel Shamans
- Souls Within
- Life & Home
- Heart 'N Mind Homeschool
- The Homeschooling Mommy
- Books & Authors
- Speak Up!
- Pawsitive Pet Parenting
- Manifesterz
- Gifts In Minutes


 RSS Feed


