
 In the heart of every home, there's a special space waiting to be transformed into a sanctuary of serenity and self-care. Let’s turn your living quarters into a blissful spa retreat for those sacred Self-Care Sundays. It's not just about pampering; it's about rejuvenating your spirit and infusing your life and work with positive energy. Setting the Scene for Tranquility Start by choosing a cozy corner. It could be your bathroom, bedroom, or any space where peace prevails. Soften the lights, play some soothing tunes, and let the world outside fade away. Candles? Absolutely. Go for natural scents like lavender or jasmine that calm the mind and soothe the soul. The Power of Healing Crystals Enhance your spa experience by bringing in the gentle touch of healing crystals. A rose quartz by your side radiates love and harmony, while amethyst can ease your thoughts, perfect for those seeking a deeper meditative state. Remember, these stones are companions on your journey to inner peace. Homemade Spa Treats Why not whip up some homemade spa goodies? A simple sugar scrub, a blend of brown sugar and olive oil, does wonders for the skin. For a refreshing face mask, mix honey and yogurt. These natural ingredients are not only skin-friendly but soul-soothing too. Mindful Practices for Inner Healing As you soak or apply your homemade treatments, practice mindfulness. Focus on your breath, the sensations on your skin, and the peacefulness within. This moment is about connecting with yourself, nurturing both body and spirit. Self-Care for Entrepreneurs For the business minds among us, Self-Care Sundays are crucial. They’re not a luxury; they’re a necessity. A relaxed mind fosters creativity and sharp decision-making. It's time to recognize that taking care of yourself is taking care of your business. Crafting Your Self-Care Sunday Box Create a self-care Sunday box filled with your spa essentials. Include your scrubs, masks, a special towel, and perhaps a journal for reflections. This box isn't just a container; it’s a treasure chest of well-being. The Gift of Relaxation Consider sharing the joy. A self-care Sunday box makes a thoughtful gift for friends, family, or even clients. It’s a meaningful way to say, “I care about you,” spreading wellness and positivity. Conclusion: Embrace Your Self-Care Ritual As we wrap up our spa day, remember that self-care is a journey, not just a destination. Every Self-Care Sunday is a step towards a more balanced, joyful life. Embrace these moments of tranquility. They are precious, just like you. In this article, we’ve explored how to transform a simple day at home into a rejuvenating spa experience. Whether you’re a business professional, a freelance writer, or someone on a spiritual path, remember that self-care is the foundation of success and inner peace. Embrace these practices, and watch how they enrich not just your Sundays, but every day of your life. *Disclaimer: Crystal and healing interpretations are for informational purposes only. Your results may vary. Be safe and wise on your magical journey.
0 Comments

Are you tired of the same old backyard setup? Ready to transform your outdoor space into a stylish and functional oasis? Look no further! In this guide, we will empower you with all the knowledge you need to create a stunning outdoor kitchen that leaves your guests in awe.
5. Materials Matter: Unveiling the Best for Outdoor Kitchen Construction
Choosing the right materials is paramount to ensure your outdoor kitchen stands the test of time. From weather-resistant countertops to durable flooring, our guide will help you make the right decisions to guarantee your kitchen's longevity. 6. DIY with Confidence: The Art of Building Your Outdoor Kitchen For the ambitious DIY enthusiasts, we present a step-by-step guide to building your outdoor kitchen with confidence. From laying the foundation to installing appliances, this section will empower you to take on the challenge like a pro. 7. Contractor’s Touch: Benefits of Seeking Professional Expertise Entrusting your outdoor kitchen construction to a professional yields numerous advantages. Discover the benefits of hiring a seasoned contractor, from reducing construction time to accessing superior craftsmanship. 8. Safety First: Ensuring a Secure and Enjoyable Outdoor Kitchen Prioritize safety without compromising style. Learn how to implement safety measures such as proper ventilation, fire-resistant materials, and smart appliance placements to guarantee a worry-free cooking experience. 9. Personalize and Enhance: Tailoring Your Outdoor Kitchen Experience Go the extra mile by personalizing your outdoor kitchen with unique touches. Incorporate seating arrangements, decorative elements, and functional add-ons that bring out your personality and create a welcoming ambiance for your guests. 10. Time to Take Action: Embark on Your Outdoor Kitchen Journey The journey to creating a functional and stylish outdoor kitchen starts now. With the knowledge and confidence gained from this guide, take immediate action and make your dream outdoor kitchen a reality! In conclusion, a remarkable outdoor kitchen is within your grasp. By combining functionality with style and leveraging the expertise of professionals or your DIY prowess, you'll create a space that elevates your home and enhances your lifestyle. So, are you ready to unlock the true potential of your backyard? Embrace the transformation and let your outdoor kitchen become the talk of the town! Remember, the key to success lies in planning, taking action, and never settling for less. A bold and powerful outdoor kitchen awaits - seize the opportunity today!  Image © Sharon Mollerus; Flickr.com When the fall season hits, it is time to start preparing your home for the winter and checking for simple repairs that you can do yourself. Doing this will help maintain your home for the coming months, making it a more comfortable and safe environment for you and your family. Here are 10 easy DIY repairs you should do on your home in the fall.
Leaking Kitchen Sinks If the pipes under your sink are leaking, simply purchase a new PVC p trap and a roll of teflon tape. Removing the old one is as simple as unscrewing the fastened areas and just pulling it off. When installing the new one, place teflon tape at all the joints and screw together the joints. To get the tightest fit, use a plumbing wrench to finish off the screwing. Test your job by running the water for a few minutes. If any water leaks out, either you did not use enough teflon tape or you did not screw the parts together tight enough. If your sink is leaking around the faucet area, rather than the pipes, you can solve this by replacing the faucet. Simply purchase a new faucet. The instructions for installing your faucet will come in the package. Each can be slightly different. You may also need caulking materials or teflon tape. Check the instructions that come with your faucet. Bathroom Leaks Much like in the kitchen, leaks need to also be addressed in the bathroom. Repairing a leak in a bathroom sin is fairly similar to replacing one in a kitchen. Toilets can also leak. Usually it is due to the ball valve kit located under the back cover. These are about 10 bucks each at a home improvement store. All you need is the kit. It is easy to install and comes with instructions. Dishwasher To clean the dishwasher, first start by pulling out all the racks and attachments. Now check all the drains and soap containers for debris. Pull any of that out. Sometimes little pieces of food or glass can get stuck in those, so watch for the glass. Once that is done, check all the rubber sealing and be sure it is all secured properly. If not, adhesive rubber strips can be purchased at home improvement stores. Application is as simple as sticking the strips in the proper spot. The adhesive on these can be strong, so be sure you have it in the proper place before pressing it to the surface. Part of maintenance also includes cleaning. For this, you'll need vinegar, concentrated lemon juice, baking soda, and a sponge or dishcloth. Sprinkle baking soda along the bottom of the dishwasher. Fill a spray bottle halfway with vinegar, 2 tablespoons of lemon juice, and the rest with water. Spray down the inside of the dishwasher, including the bottom, where the baking soda is. The baking soda will bubble. This is fine. That pulls up dirt and grease. Now starting at the bottom, scrub the entire inside of the dishwasher, including the door. Do not rinse away the solution. Replace the racks and fill all soap and other liquid dispensers with the lemon juice and vinegar mixture. Close them and run a normal cycle with a hot rinse and heated drying cycle. Weather Stripping Check the weather stripping on the interior, as well as the exterior of your home. Replace any worn or peeling areas. Damaged or improperly placed weather stripping can cause cool air to come inside the home, as well as let heat escape. Weather stripping can be purchased at hardware and home improvement stores. There is stripping with adhesive or that which has to be nailed down. Apply according to which type you choose. Be sure the stripping is applied securely to the surface so that it does its job effectively. Sealing Cracks Check interior and exterior doors and windows for cracks. Use caulking to seal any detected problem areas. To caulk a crack around a door or window, simply squeeze a line of caulking along the exposed area and swipe it with a caulking sponge to press the sealant in further, as well as to create a smooth finish. Don't forget to also purchase a caulking gun when you buy the caulk. Without one, the caulking is not as easy to apply. A caulking gun can be as low as a few dollars. Exterior Basement Drains Some homes can have exterior drains leading to the basement. Be sure to clear away any brush, leaves, dirt, or other debris from the drain openings. Vinegar is a great natural substance that cuts through tough-to-remove dirt and other substances. Simply spray it on from a water bottle, let it sit for a moments, clear away the debris, and wipe the surface clean with a cloth. As for the inside of the drain, run a plumbing snake or auger through the drain. If it is a short drain, a wire coat hanger can sometimes be substituted for the snake or auger if you don't have access to either. Just pull the coat hanger in and out of the drain. Shut Off Outside Water The fall season is a great time to shut off the access to any outside water. Doing so can prevent the freezing of the outdoor pipes around hoses and other outdoor water valves. Also, when you do this, unfasten any hoses or other devices attached to outside water valves. These should be stored away until spring. Carbon Monoxide & Smoke Detectors This is a good step for more than just the fall season, but be sure you check to see that all of your detection devices are working properly. Most some detectors and carbon monoxide detectors have a test button. Press that button on each to see if they work properly. With increased usage of space heaters, fireplaces, and other heating devices during the fall season, it is important that your family will have working alert devices, should a fire or natural gas problem occur. Gutters During the fall, leaves, pine-cones, and other falling debris can get clogged in your gutters. Clogged gutters can lead to poor drainage. To clean out your gutters, simply scoop out the debris that has collected. A garden trowel works well for this. Once that is done, spray the gutters out with a garden hose or pressure washer. If you are using a garden hose, attaching a high pressure spray nozzle will make this easier. If any of the tubular gutters are clogged, use a plumbing snake or auger to unclog them. Thermostat & Heaters It is important to be sure your thermostat and heaters are working before he weather starts to get cooler. First, test them by simply turning them on and being sure that the heat is coming out at the right temperature. If there is no heat coming from portable heaters, they should be replaced. If there is no heat coming from the furnace, you will need to test the thermostat. To do this, first turn off your furnace. Then, return to your thermostat box and remove the cover. Remove the wires from the panel by unscrewing them from it. Take the red and white wire and wrap them together. Tape the wires you won't use to something, such as the wall, while you are working. You don't want to lose them inside the wall. Turn the the furnace back on. If the furnace blows and its burner ignites, then your thermostat is bad. If this doesn't happen, you may actually have a problem with the wires, not the thermostat. Check to make sure the wires run all the way to the furnace. *Also found on Better Plumbing © Lyn Lomasi; Write W.A.V.E. Media
by April Paul, Brand Shamans & Write W.A.V.E. Media
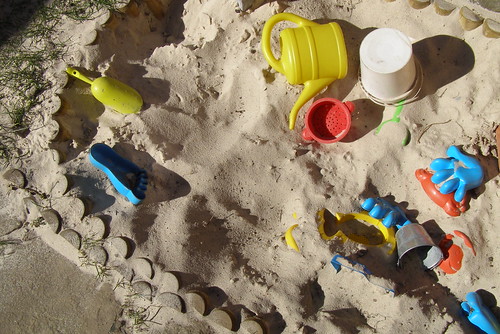
Summertime is the time of year when everyone wants to go swimming. Not everyone has access to a beach and not everyone who does have beach access feels like going to the beach for whatever reason. Maybe it's too crowded, there's no beach, or you don't want everyone seeing you in your swimwear. No matter your reasons, here's a fun solution. Create a beach in your own backyard.
Materials Needed
Creating Your Backyard Beach Step1: Forming Your Backyard Beach Shore To make your beach shore, you will need to fill your sandbox or boxed-off area with beach sand. Beach sand can be bought at retail stores that sell gardening supplies. It is also sold at many home improvement warehouses, such as Home Depot. If your city has neither of these, you may want to ask someone at a local hardware or garden store. It can also be purchased from gravel and rock manufacturers as well as from playground manufacturers. Beach sand is readily accessible. Keep in mind that in order to create the full effect, you are going to need a large amount. You will want to fill a space that when full, the whole family can spread out onto comfortably. When filling your area, make sure to get the beach sand as high up as possible. You want your surface to rise at least 2 feet from the ground. If you cannot find something that is this high, you can purchase a second baby pool that is 2 feet high and fill it with the sand. Save enough beach sand to line the entire bottom of the water pool 2 inches high. Line the pool bottom with sand before filling it with water. Step 2: Creating Your Backyard Ocean The pool will serve as your ocean. It should be placed directly in front of your shore. It is helpful to get a square or rectangle-shaped pool, but not necessary. The square or rectangle-shaped pool will align better with the shore and create the best mock beach. The sides of your pool should be 2 feet high to match the height of the shore. Most standard baby and family pools are 2 feet high. After aligning your "ocean" as best as possible to the "shore", you will need to fill the bottom 2 inches full of sand. Pack it tight. You may need to add a small amount of water to make it firm. Once that is done, fill the pool with water to the desired fill line. If any sand is clouding the water, let it settle before swimming. Step 3: Setting Up For the Day At Your Backyard Beach A day at the beach usually consists of playing in the sand, sun bathing, swimming, and eating packaged lunches. For the full effect, pack your cooler with everything you'll need and put it in the sand. Lay out all your beach toys in the sand. Do not forget anything in the house. Do not use the house for anything but a restroom. Lay out your towels on the sand as you would at the beach. Spend the day playing in the sand, lounging in the sand, swimming, and doing what you would normally do at the beach. Maintaining Your Backyard Beach If you enjoyed using your backyard beach, you will want to utilize it more often. If you bought a pool and sandbox with a cover, this will be easy. If not, there is still hope. The first step in maintenance is to get a toy sand sifter or kitchen strainer and sift out all the grass and other large residue. Once this is done, put a small amount of chlorine in your pool to disinfect the germs. If your family cannot tolerate chlorine, vinegar is an alternative. It will likely take an entire gallon of vinegar. Pour it in the pool and let it sit for at least a few hours before swimming in it again. Repeat this after each day of swimming. Cover the pool and sandbox after cleaning and adding the disinfectants mentioned above. If you don't have covers, tarps also work well because you can cover the areas. Then with sticks or stakes, you can secure the corners to the ground. This will keep out leaves and other debris. The water will likely need to be refilled at times because as people play in it, some will naturally get lost. Evaporation also takes some water. Remember that whenever you have to refill your water, you will also need to add more vinegar or chlorine. Always check the labels on the chlorine for proper amounts. For the vinegar, if you can smell it very strongly, you have used too much. The sandbox in your backyard beach may need to be sifted through for debris to keep it clean. Always keep it covered when it is not in use. This will keep neighborhood animals, as well as your own, from using it as a restroom or digging it up. *Note that this content is for informational purposes only. Please check with your health provider and use your own discretion when it comes to health, safety, and sanitary practices. 
Oh no! It will soon be time for summer fun in the yard. Excited to begin but your lawn isn't? Whether you have missing patches of grass to fill or need to seed an entire lawn, this easy step-by-step guide will help you learn how to plant grass seed.
Before planting grass seed, keep in mind the best temperatures and seasons for planting. A temperature of above 70F is optimal. Anything below (especially freezing temperatures), will create a longer wait time for the seedlings to start sprouting. Late spring and early summer are the best planting seasons for starting new grass seed. Loosen Soil The first step in planting grass seed is to loosen the soil. For smaller areas, a regular garden hoe will do the trick. For larger areas, you may want to use a till. Your goal is to bring up the second layer of soil to the surface. Prepare Soil Prepping the soil comes in a few steps. First rake the soil to clear it of any leaves or other unwanted items. Next, mix some topsoil in with the original soil from the ground. Spread that mixed soil over the area where the grass seed will be planted. Fertilize Soil The next step is to fertilize the soil. This can be done with the use of a handheld spreader for small areas. For larger areas, use a traditional spreader. Spreaders can be purchased at a fairly decent price at home improvement stores and warehouses, such as Home Depot. Spread Seeds Now that the soil is ready, it is time to spread the seeds throughout the planting area. For smaller areas, this can be done by hand. Just as with the fertilizer, a spreader can be used if necessary. Water Seeds Now that the seeds have been spread, it is time to water them. Be sure that the seeds get plenty of water. Soil should be moist and the water should run deep into the soil. Watering daily will help the seeds germinate properly. It may take up to three weeks for the planted seeds to grow into grass. Once it has grown to almost 3 inches, it is safe to mow, but never mow off more than 1/3 of the original height. |
LIfe & Home Journal

Archives
January 2024
Categories
All
|
- Brand Shamans
- Brand Healing
- Inner Healing
-
INTENT-SIVE NATURE
- Content & Brand Elevation
- Healing Jewelry & Talismans
- Bath, Beauty, & Self-Care
- Healing Sessions
- Rituals, Herbs, & Altar Supplies
- Gawwwdess Baby Boutique
- Soul Flame Gifts
- Yoga & Meditation
- Books & Media
- Education & Homeschool Resources
- Home, RV, & Decor
- Clothing
- Pets
- Custom Orders
- Monthly Subscription Boxes
- October Festivals
- Herbal Intent
- FLOW-Key Parenting
- About & Contact
- RV, Nature, & Travel Shamans
- Souls Within
- Life & Home
- Heart 'N Mind Homeschool
- The Homeschooling Mommy
- Books & Authors
- Speak Up!
- Pawsitive Pet Parenting
- Manifesterz
- Gifts In Minutes
 RSS Feed