

Are you tired of the same old backyard setup? Ready to transform your outdoor space into a stylish and functional oasis? Look no further! In this guide, we will empower you with all the knowledge you need to create a stunning outdoor kitchen that leaves your guests in awe.
5. Materials Matter: Unveiling the Best for Outdoor Kitchen Construction
Choosing the right materials is paramount to ensure your outdoor kitchen stands the test of time. From weather-resistant countertops to durable flooring, our guide will help you make the right decisions to guarantee your kitchen's longevity. 6. DIY with Confidence: The Art of Building Your Outdoor Kitchen For the ambitious DIY enthusiasts, we present a step-by-step guide to building your outdoor kitchen with confidence. From laying the foundation to installing appliances, this section will empower you to take on the challenge like a pro. 7. Contractor’s Touch: Benefits of Seeking Professional Expertise Entrusting your outdoor kitchen construction to a professional yields numerous advantages. Discover the benefits of hiring a seasoned contractor, from reducing construction time to accessing superior craftsmanship. 8. Safety First: Ensuring a Secure and Enjoyable Outdoor Kitchen Prioritize safety without compromising style. Learn how to implement safety measures such as proper ventilation, fire-resistant materials, and smart appliance placements to guarantee a worry-free cooking experience. 9. Personalize and Enhance: Tailoring Your Outdoor Kitchen Experience Go the extra mile by personalizing your outdoor kitchen with unique touches. Incorporate seating arrangements, decorative elements, and functional add-ons that bring out your personality and create a welcoming ambiance for your guests. 10. Time to Take Action: Embark on Your Outdoor Kitchen Journey The journey to creating a functional and stylish outdoor kitchen starts now. With the knowledge and confidence gained from this guide, take immediate action and make your dream outdoor kitchen a reality! In conclusion, a remarkable outdoor kitchen is within your grasp. By combining functionality with style and leveraging the expertise of professionals or your DIY prowess, you'll create a space that elevates your home and enhances your lifestyle. So, are you ready to unlock the true potential of your backyard? Embrace the transformation and let your outdoor kitchen become the talk of the town! Remember, the key to success lies in planning, taking action, and never settling for less. A bold and powerful outdoor kitchen awaits - seize the opportunity today!
0 Comments
 If you're looking for a way to refresh your room and upgrade to a more healing experience, this Blue Spiritual Wisdom home decor collection can help you vibrate higher.
by Alicia Bodine, Contributing Writer
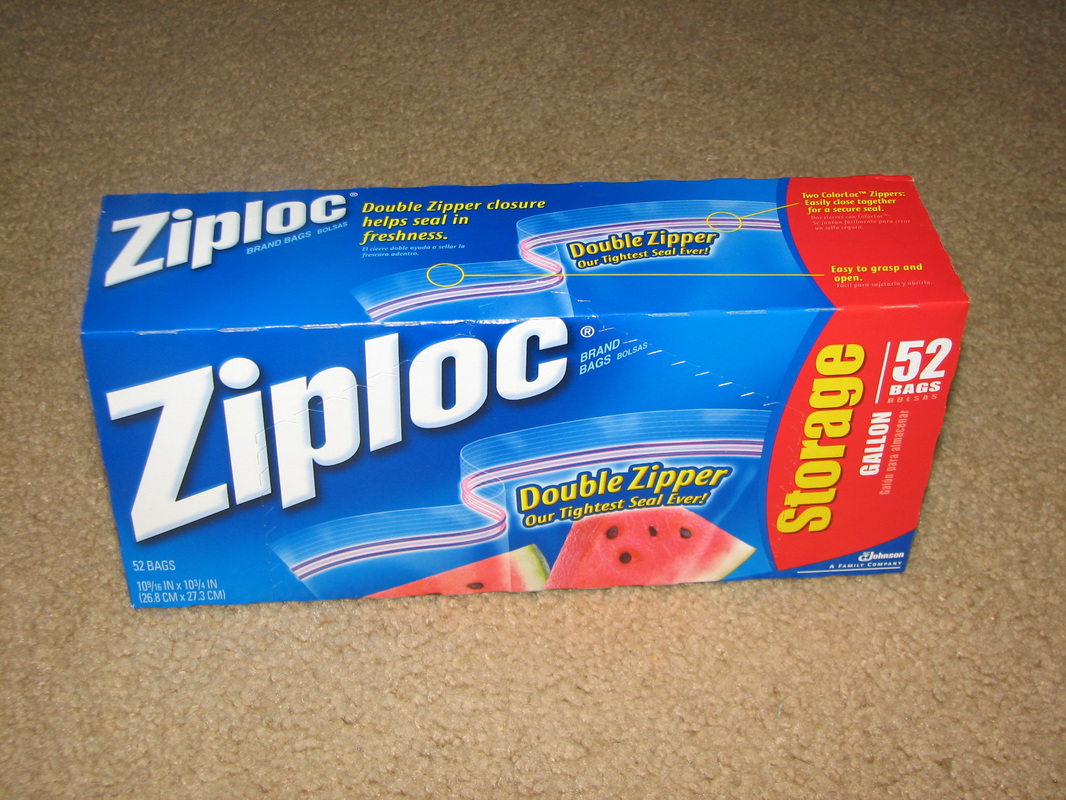
1. Salsa's and Dips for your next party. Most dips taste good when you mix them with sour cream and leave them in your refrigerator over night. The Twist n' Loc containers are perfect for this. Mix right in the container, lock the lid, refrigerate, and serve.
2. Cheerios. Mom's are always on the go. What do we take with us most often? Cheerios. They are healthy for our kids and easy to transport. The Twist n' Loc containers are great to keep the cheerios from spilling all over the car. 3. Lego's. Those Lego's are small. They could easily fit in to the Ziploc containers for quick clean up and storage. 4. As a measuring cup. Twist n' Loc containers come with measuring lines on both sides. Cooking has just become a little easier. This is also helpful for the person who is watching their weight and needs to keep an eye on their portions. 5. For freezing leftovers. Make sure you leave 1/4" to 1/2" of air space at the top for freezer expansion. Ziploc containers work just as well as the Ziploc freezer bags except your leftovers can go right from the freezer to the microwave.
6. A candy bowl. Fill your container with M & M's or Hershey's Kisses. Place in the center of your coffee table as a holiday treat for your guests.
7. Pen/Pencil holder. Keep your office organized by placing all your pens, pencils, markers, etc. in a Ziploc Twist n' Loc container. I personally keep all my paper clips in the containers. The containers can be used to keep any of your office supplies in order. 8. Gifts. Pack your favorite cookie recipe ingredients in the Ziploc containers and wrap as a holiday or birthday gift. These containers transport perfectly and are much safer than glass jars. 9. Craft Supplies. Need a container for all those cotton balls? How about your scrap booking stickers? Store your craft supplies neatly in your craft closet with the new Twist n' Loc containers. 10. Packing your lunch. Take soup to school or work. Ziploc containers are microwavable and safe from leaks. Now you can see why I have become a big fan of the new Ziploc Twist n' Loc containers. You can buy these containers at just about any grocery store for about $3.14 (double pack). After time your containers will wear and you can replace them without spending an arm and a leg. This article was previously published on the Yahoo Contributor Network.  Image © Alexander von Halem; Flickr.com Various essential oils are known for a variety of medicinal and aromatherapy properties. Lemon essential oil is no different. In fact, more uses are being discovered all the time. Here are ten of the most common household and medicinal uses for lemon essential oil, accompanied by instructions on how to use the oils for each. Orange oil and other citrus oils have some of the same uses as lemon oil. However, lemon oil seems to be more effective.
Respiratory Ailments Lemon essential oil can be used in conjunction with a steam inhalation treatment for wheezing, colds, cough, and other upper respiratory problems. Note that this should not be used in those with asthma. To take a steam inhalation treatment with lemon essential oil, fill a large bowl or pan with boiling hot water and a few drops of lemon essential oil. Place the afflicted person's head over the bowl and then place a towel over the head and bowl (in a tent-like fashion), so that no steam escapes. The person should take a few deep breaths, breathing the vapors in deeply for a couple minutes. If at any time, the treatment causes you to feel uncomfortable, stop right away. Be careful to not get burned by the water from spills or beng too close to the bowl. As with any medical treatment, contact a licensed medical professional before starting any medical treatment. Disinfectant Lemon is a disinfectant and can be used as a deodorizer, neutralizer, and air sterilizer. Simply add a few drops of the lemon essential oil to a spray bottle filled with water. The same concoction can also be sprayed onto tables, counter tops and other surfaces. Test an inconspicuous area on the surface before use by adding a small amount and waiting 24 hours for the effect (if any). The oil can be good for many surfaces, but it also could damage some. Mouthwash Lemon essential oil can be used as a mouthwash. Add a couple drops to a 4 oz glass of water and gargle. The disinfectant properties are great for germs in the mouth and for neutralizing bad breath odors, as well. Energy For a quick, refreshing energy boost, combine a couple drops each of lemon essential oil and peppermint essential oil in a glass of water and drink up. Insect Repellent Put a few drops of lemon essential oil in a spray bottle filled with water and spray onto the skin as an insect repellent. However, do not use this repellent method in the sun. Lemon oil can do damage to the skin if the treated skin is exposed to the sun. Avoid sun exposure for 12 hours after applying lemon essential oil to the skin. This method is best used at night or on cloudy and cool days. Heartburn Add a couple drops of lemon essential oil to a glass of water. Drink the full glass. This is said to relieve heartburn symptoms by neutralizing the acid. Cough, Sore Throat, and Fever Adding a couple drops of lemon essential oil to your glass of water can help soothe a sore throat, calm a cough, and quell a fever. Lemon oil fights against bacteria, as well as viruses. There aren't many substances around that can do both. Many will do one or the other. Hair, Skin, and Nails Lemon oil can be used to fight against oily skin and hair. It also has cleansing properties and is often an ingredient in homemade hair products. One thing to keep in mind with using lemon in the hair is that if you go into the sun, the lemon oil might react in such a way that it lightens your hair up a bit. In my experience, this can make for some good highlights, if applied in the right manner. Lemon oil is also great nourishment for the nails and can help fight against nail fungus. Anxiety Lemon essential oils are often used in aromatherapy, specifically for anxiety and depression. Memory & Thought Clarity Lemon essential oil, when used in combination with rosemary may help increase memory, increase concentration, and provide more clarity of thought. To create this helpful blend, use 3 drops of rosemary, 3 drops of lemon oil, and diffuse it. * The author is not a medical professional. Before using any treatments, natural or not, a licensed medical professional should be consulted.  Image © Sharon Mollerus; Flickr.com When the fall season hits, it is time to start preparing your home for the winter and checking for simple repairs that you can do yourself. Doing this will help maintain your home for the coming months, making it a more comfortable and safe environment for you and your family. Here are 10 easy DIY repairs you should do on your home in the fall.
Leaking Kitchen Sinks If the pipes under your sink are leaking, simply purchase a new PVC p trap and a roll of teflon tape. Removing the old one is as simple as unscrewing the fastened areas and just pulling it off. When installing the new one, place teflon tape at all the joints and screw together the joints. To get the tightest fit, use a plumbing wrench to finish off the screwing. Test your job by running the water for a few minutes. If any water leaks out, either you did not use enough teflon tape or you did not screw the parts together tight enough. If your sink is leaking around the faucet area, rather than the pipes, you can solve this by replacing the faucet. Simply purchase a new faucet. The instructions for installing your faucet will come in the package. Each can be slightly different. You may also need caulking materials or teflon tape. Check the instructions that come with your faucet. Bathroom Leaks Much like in the kitchen, leaks need to also be addressed in the bathroom. Repairing a leak in a bathroom sin is fairly similar to replacing one in a kitchen. Toilets can also leak. Usually it is due to the ball valve kit located under the back cover. These are about 10 bucks each at a home improvement store. All you need is the kit. It is easy to install and comes with instructions. Dishwasher To clean the dishwasher, first start by pulling out all the racks and attachments. Now check all the drains and soap containers for debris. Pull any of that out. Sometimes little pieces of food or glass can get stuck in those, so watch for the glass. Once that is done, check all the rubber sealing and be sure it is all secured properly. If not, adhesive rubber strips can be purchased at home improvement stores. Application is as simple as sticking the strips in the proper spot. The adhesive on these can be strong, so be sure you have it in the proper place before pressing it to the surface. Part of maintenance also includes cleaning. For this, you'll need vinegar, concentrated lemon juice, baking soda, and a sponge or dishcloth. Sprinkle baking soda along the bottom of the dishwasher. Fill a spray bottle halfway with vinegar, 2 tablespoons of lemon juice, and the rest with water. Spray down the inside of the dishwasher, including the bottom, where the baking soda is. The baking soda will bubble. This is fine. That pulls up dirt and grease. Now starting at the bottom, scrub the entire inside of the dishwasher, including the door. Do not rinse away the solution. Replace the racks and fill all soap and other liquid dispensers with the lemon juice and vinegar mixture. Close them and run a normal cycle with a hot rinse and heated drying cycle. Weather Stripping Check the weather stripping on the interior, as well as the exterior of your home. Replace any worn or peeling areas. Damaged or improperly placed weather stripping can cause cool air to come inside the home, as well as let heat escape. Weather stripping can be purchased at hardware and home improvement stores. There is stripping with adhesive or that which has to be nailed down. Apply according to which type you choose. Be sure the stripping is applied securely to the surface so that it does its job effectively. Sealing Cracks Check interior and exterior doors and windows for cracks. Use caulking to seal any detected problem areas. To caulk a crack around a door or window, simply squeeze a line of caulking along the exposed area and swipe it with a caulking sponge to press the sealant in further, as well as to create a smooth finish. Don't forget to also purchase a caulking gun when you buy the caulk. Without one, the caulking is not as easy to apply. A caulking gun can be as low as a few dollars. Exterior Basement Drains Some homes can have exterior drains leading to the basement. Be sure to clear away any brush, leaves, dirt, or other debris from the drain openings. Vinegar is a great natural substance that cuts through tough-to-remove dirt and other substances. Simply spray it on from a water bottle, let it sit for a moments, clear away the debris, and wipe the surface clean with a cloth. As for the inside of the drain, run a plumbing snake or auger through the drain. If it is a short drain, a wire coat hanger can sometimes be substituted for the snake or auger if you don't have access to either. Just pull the coat hanger in and out of the drain. Shut Off Outside Water The fall season is a great time to shut off the access to any outside water. Doing so can prevent the freezing of the outdoor pipes around hoses and other outdoor water valves. Also, when you do this, unfasten any hoses or other devices attached to outside water valves. These should be stored away until spring. Carbon Monoxide & Smoke Detectors This is a good step for more than just the fall season, but be sure you check to see that all of your detection devices are working properly. Most some detectors and carbon monoxide detectors have a test button. Press that button on each to see if they work properly. With increased usage of space heaters, fireplaces, and other heating devices during the fall season, it is important that your family will have working alert devices, should a fire or natural gas problem occur. Gutters During the fall, leaves, pine-cones, and other falling debris can get clogged in your gutters. Clogged gutters can lead to poor drainage. To clean out your gutters, simply scoop out the debris that has collected. A garden trowel works well for this. Once that is done, spray the gutters out with a garden hose or pressure washer. If you are using a garden hose, attaching a high pressure spray nozzle will make this easier. If any of the tubular gutters are clogged, use a plumbing snake or auger to unclog them. Thermostat & Heaters It is important to be sure your thermostat and heaters are working before he weather starts to get cooler. First, test them by simply turning them on and being sure that the heat is coming out at the right temperature. If there is no heat coming from portable heaters, they should be replaced. If there is no heat coming from the furnace, you will need to test the thermostat. To do this, first turn off your furnace. Then, return to your thermostat box and remove the cover. Remove the wires from the panel by unscrewing them from it. Take the red and white wire and wrap them together. Tape the wires you won't use to something, such as the wall, while you are working. You don't want to lose them inside the wall. Turn the the furnace back on. If the furnace blows and its burner ignites, then your thermostat is bad. If this doesn't happen, you may actually have a problem with the wires, not the thermostat. Check to make sure the wires run all the way to the furnace. *Also found on Better Plumbing © Lyn Lomasi; Write W.A.V.E. Media |
LIfe & Home Journal

Archives
January 2024
Categories
All
|
- Brand Shamans
- Brand Healing
- Inner Healing
-
INTENT-SIVE NATURE
- Content & Brand Elevation
- Healing Jewelry & Talismans
- Bath, Beauty, & Self-Care
- Healing Sessions
- Rituals, Herbs, & Altar Supplies
- Gawwwdess Baby Boutique
- Soul Flame Gifts
- Yoga & Meditation
- Books & Media
- Education & Homeschool Resources
- Home, RV, & Decor
- Clothing
- Pets
- Custom Orders
- Monthly Subscription Boxes
- October Festivals
- Herbal Intent
- FLOW-Key Parenting
- About & Contact
- RV, Nature, & Travel Shamans
- Souls Within
- Life & Home
- Heart 'N Mind Homeschool
- The Homeschooling Mommy
- Books & Authors
- Speak Up!
- Pawsitive Pet Parenting
- Manifesterz
- Gifts In Minutes
 RSS Feed